
Low Volume Light Love
You probably already know how much I love low volume fabrics. They are easily my favorite fabrics to work with and I tend to sneak as many into every project that I can. And that goes beyond quilts! Whenever I find a new way to feature my favorite fabrics, I do. So let there be low volume light!
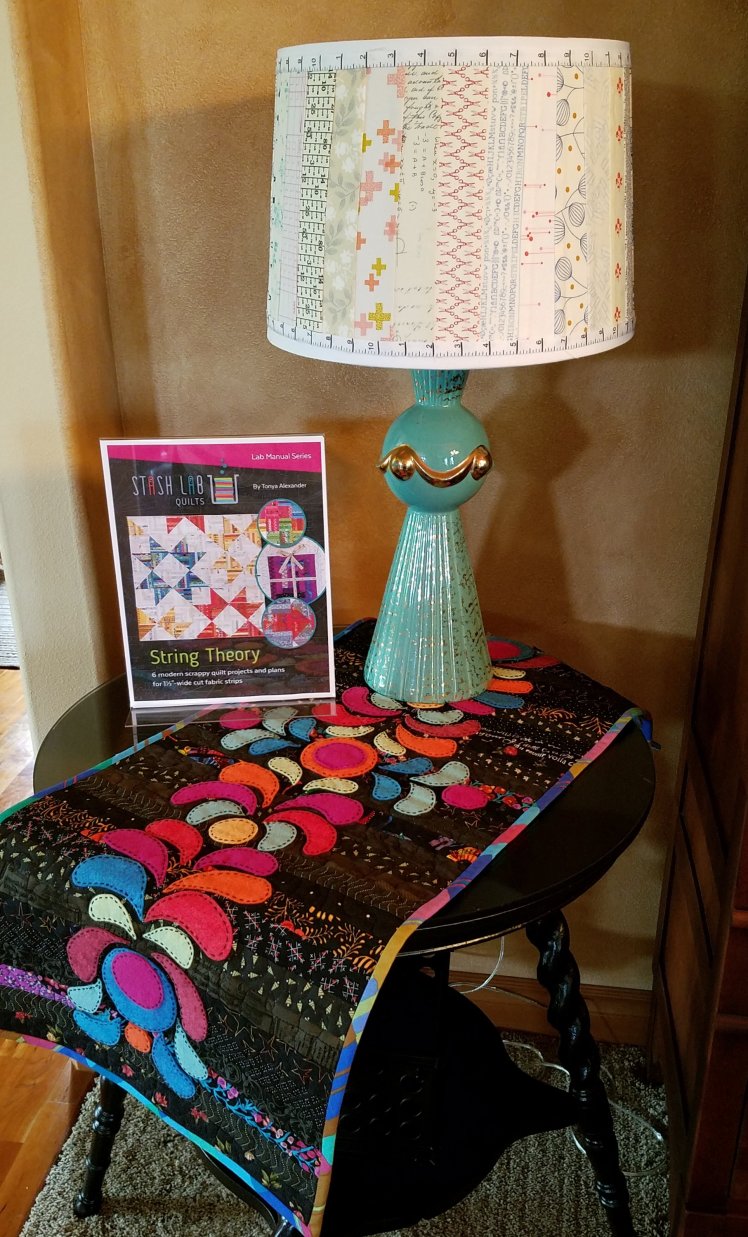
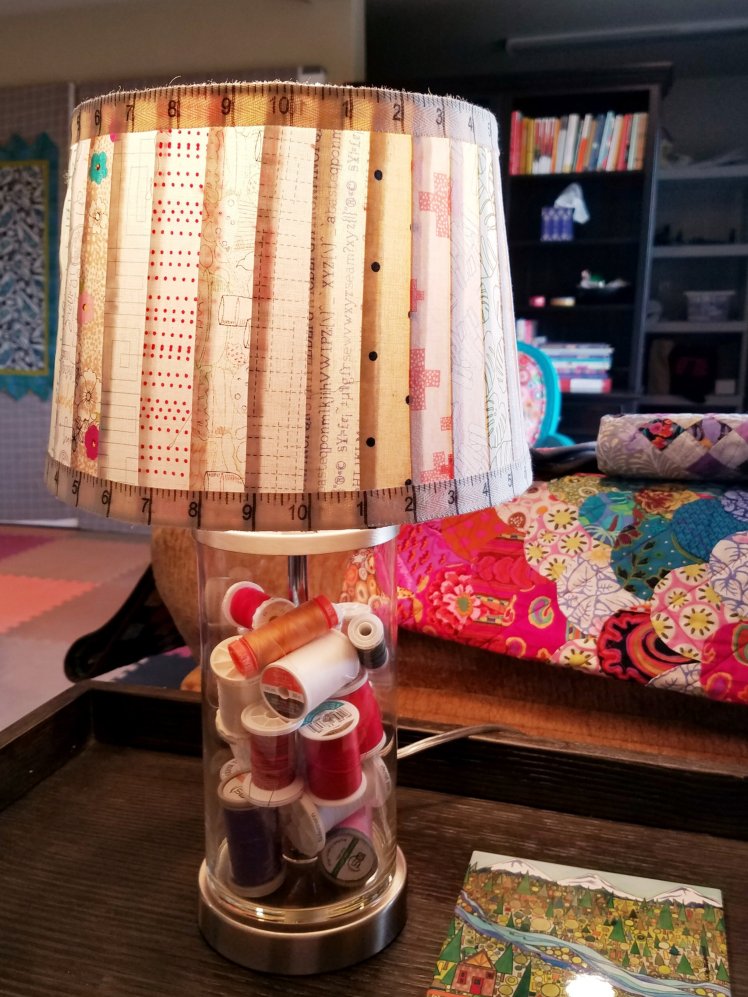
Last spring for quilt market, I featured low volume scrap strips on a lamp shade for my display table. After market, I gifted it to a friend (who happened to have lent me the lamp base!) How could I not? I loved it so much, I decided to make another one for my work desk in my studio space. After the chair project, this was a snap!
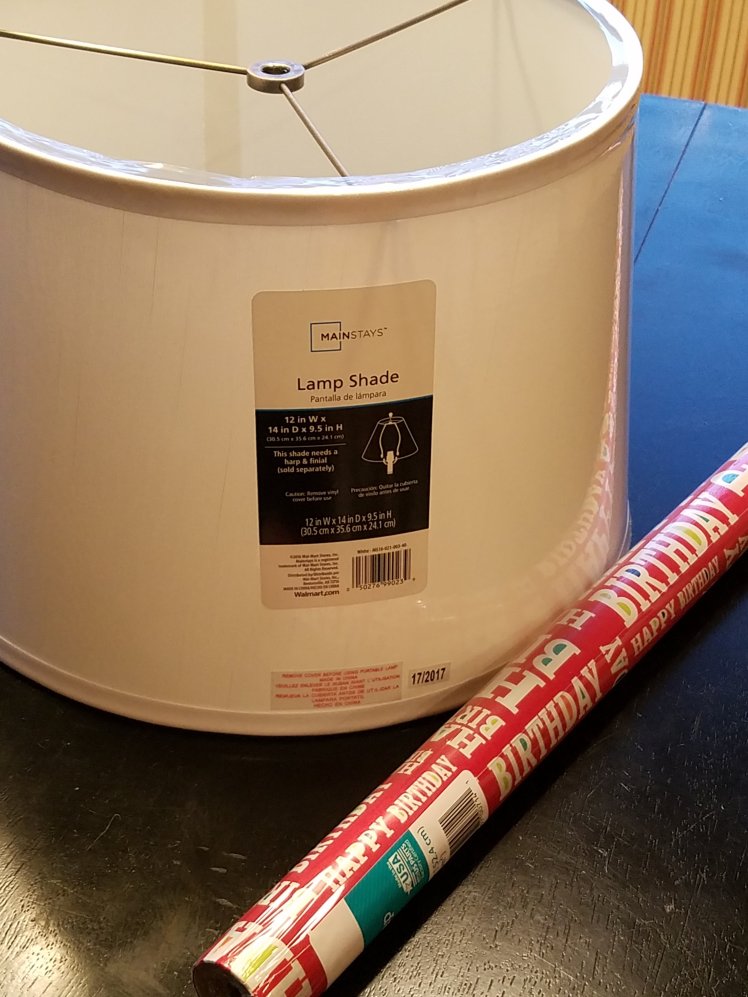
Any lampshade will do but white or some other light color would be best and the straighter the sides the better. So look for a drum style shade instead of a flared one. You can use a flared one but your fabric strips will just need to be wider to cover it and most of my scrap strips are my beloved 1 1/2″ wide strips.
You’ll need:
- lamp shade
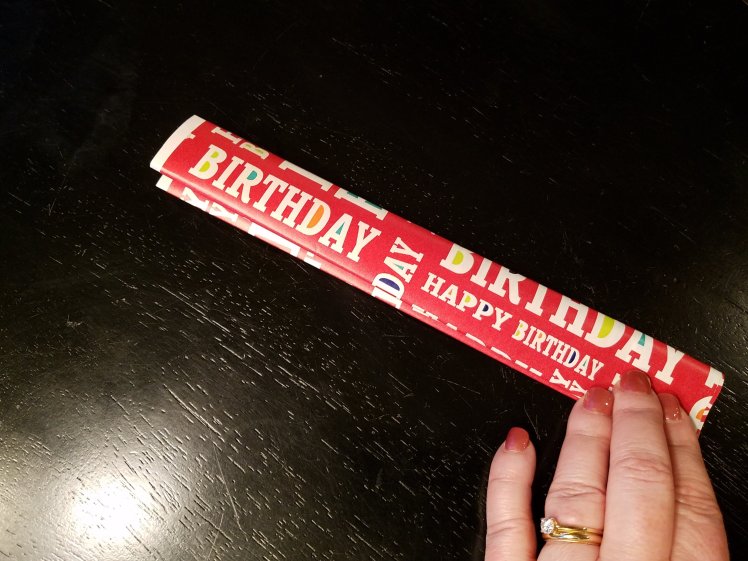
- roll of wrapping paper (to trace your template)
- fabric strips of your choosing – low volume only for me! as many as you need to go around your lampshade
- twill tape ribbon or similar to trim your shade
- spray adhesive (not basting spray)
- Add-a-Quarter ruler, or other acrylic ruler with marked 1/4″
- hot glue gun
- your normal sewing supplies

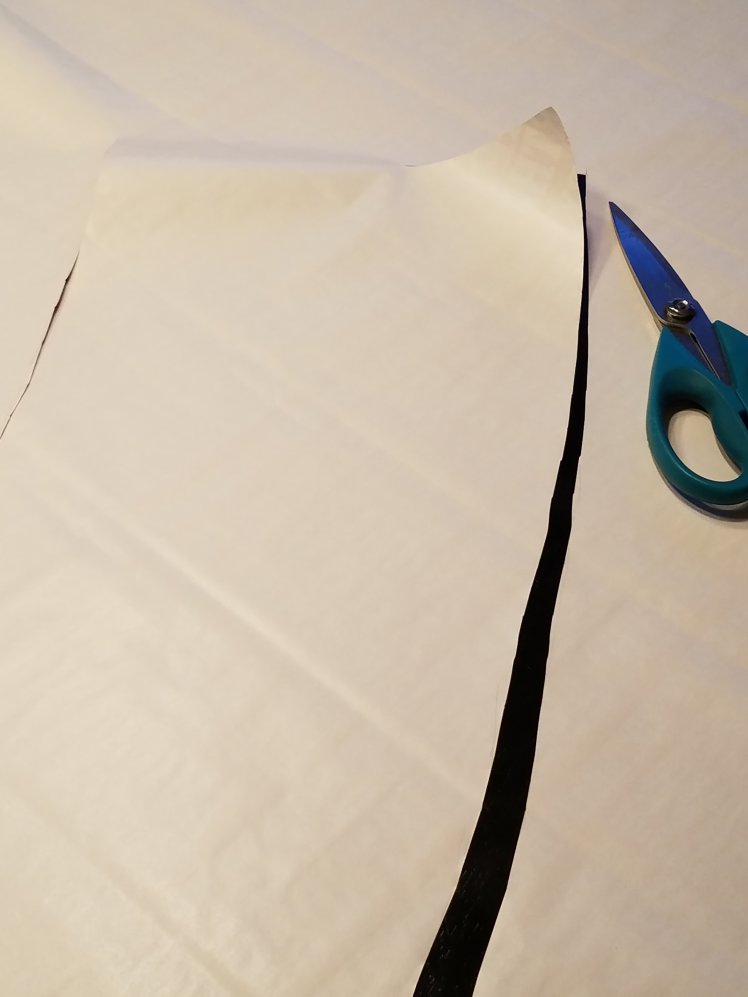
So pretty easy, especially if you’ve done some paper foundation piecing. The first step is to make your paper template. I like to use a roll of cheap, flimsy wrapping paper. It can be any color or design because it will get torn out after sewing all of your strips together. Flimsy wrapping paper can be frustrating when you’re trying to wrap a gift but tears away beautifully for this project. Lay out the wrapping paper and roll the lamp shade a full turn, tracing the top and bottom as you go.

Cut it out along the traced lines.
After you cut out your template, test it out by wrapping it around the shade to make sure it’s covered. You can overlap by about an inch and trim more later if you want to.
Next, we need to mark sewing lines on the template. You have two choices: you can either draw your stitching lines with a ruler or you can fan fold and make creases to mark your stitching lines like this:
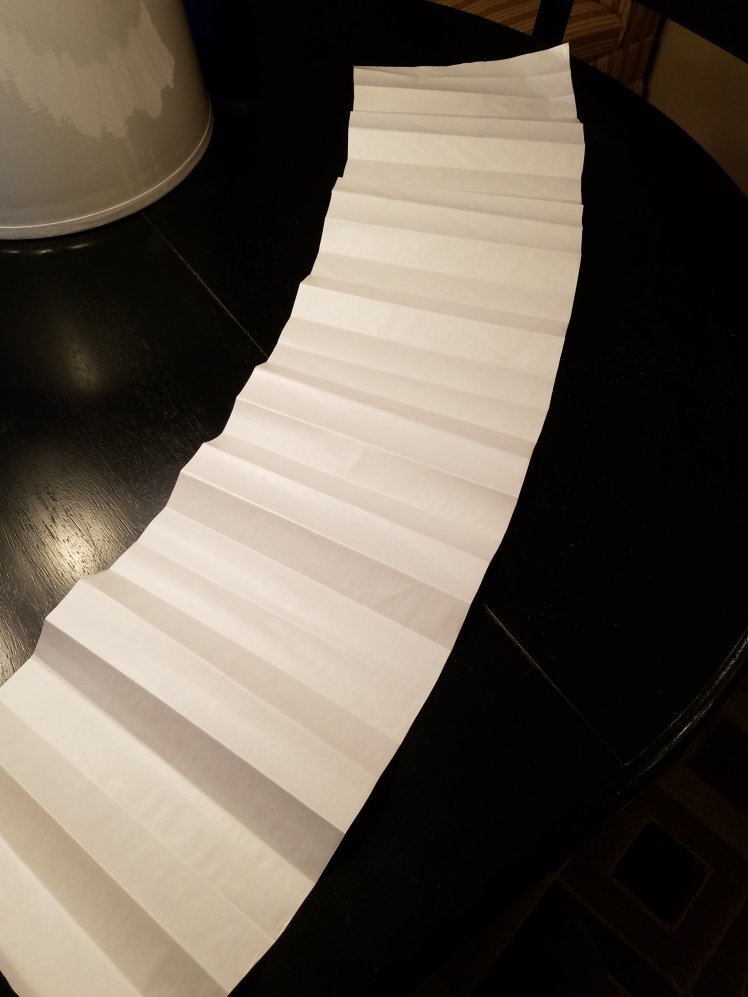
How close together you draw or fold your lines will determine how skinny or wide your fabric strips will need to be. With almost every lampshade, there will be a slight flare at the base. If you don’t pre-mark your lines and just sew straight cuts of fabric together, you would end up with your fabric slanting all the way around.
Time to sew! Begin somewhere in the middle of the paper template. Place two fabric strips right sides together so that they cover one section and extend over the next crease by at least 1/4 inch. Your strips should be long enough to extend 1/2″ beyond the template at both ends. Pin in place. It should look something like this. Stitch on the marked line, in my example, the crease line.
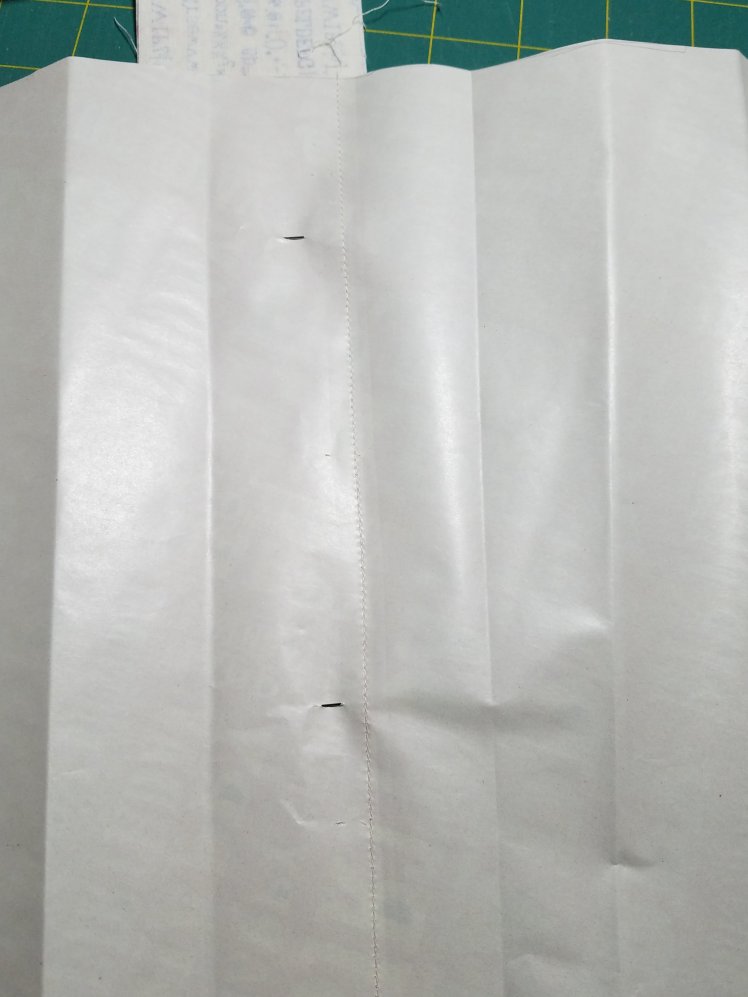
When you turn it back over, it will look like this.

Remove the pins, and flip over the top sewn strip. Give it a press with your iron – NO STEAM for now! Depending on how flimsy your paper, using steam would be asking for trouble. You should now have something like this.
Turn your piece back over and fold back the next crease or marked line on your template. I like to use my trusty Add-A-Quarter ruler when I’m doing this kind of foundation piecing. Placing the ruler 1/4″ beyond the fold, trim off any fabric excess beyond the 1/4 inch to get ready for your next strip.

Lay your next fabric strip right side up on the table and place the template piece on top, aligning the strip edges.

Again, open the template over the layer pieces and pin the three layers into place. Sew again on the next marked line.

Keep adding your strips using this flip and sew method on the paper foundation both directions until your paper template is completely covered.

When the foundation is covered completely with your fabric strips, give it a nice hot press with the iron. Look at all that low volume loveliness!

Time for the trim along the top and bottom lines of the template. Scissors or rotary cutter make quick work of this.

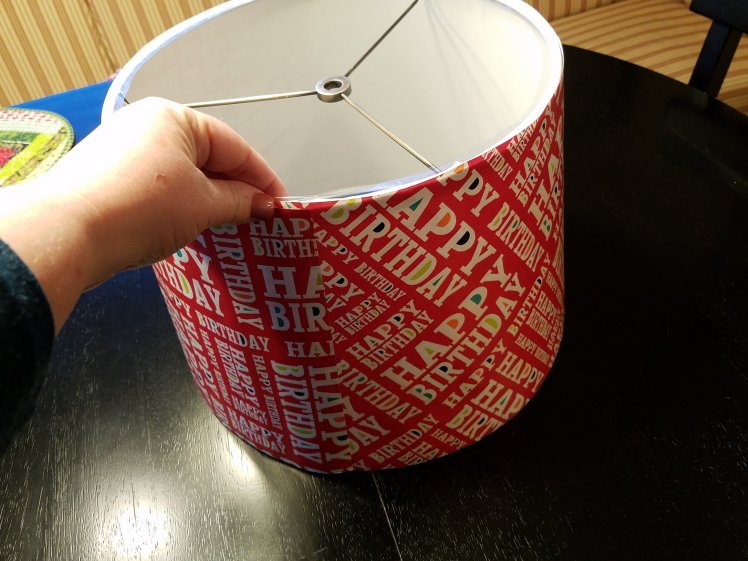
After you tear away all of your foundation paper, you’re ready to cover your lampshade. Position your fabric piece on the lampshade to see how it will lay. Take away and spray the surface of the lampshade all over with the spray adhesive (you might want to do this outside or be sure to cover your work surface and ventilate well.) Lay your pieced fabric piece back on and smooth over the surface of the lampshade, working out any creases as you go.


Ready for the final trim! Measure your trim ribbon to fit and cut to size. Using your glue gun, run a bead of glue around the top edge a few inches at a time and attach your ribbon trim. Repeat for the bottom of the shade.
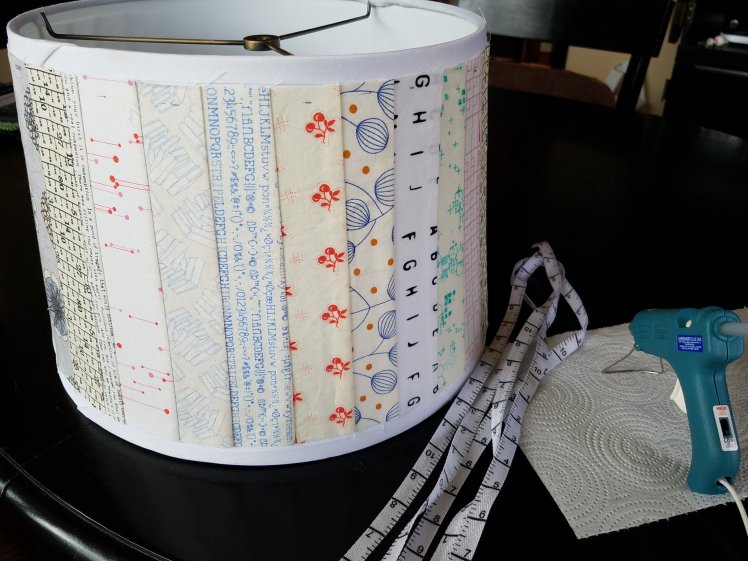
I found binding clips to be helpful holding my trim pieces in place as I worked my way around with the glue gun.

All you have to do now is put your shade back on your lamp base and flip the switch. Ta-dah! Low volume light love! Now comes the hard part: deciding where to put it 🙂
Enjoy,
Tonya
