Purr-fect Patchwork Blog Tour

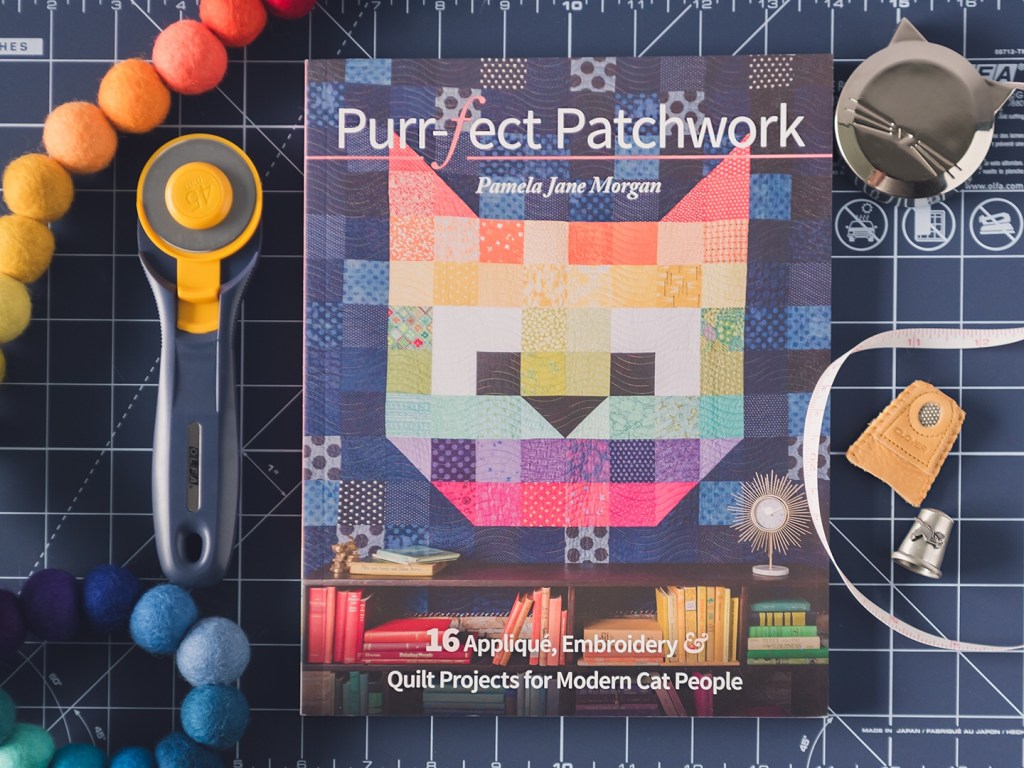
Well, here we go! Welcome to my stop on the Purr-fect Patchwork blog tour featuring the projects you will find in my friend Pamela Morgan’s delightful new book Purr-fect Patchwork with C&T Publishing!

Full disclosure, I am not a current cat owner – but that didn’t disqualify me from joining the blog tour! (I do have a golden doodle named Winston and cats like me, so maybe I was just grand-fathered in or something.)

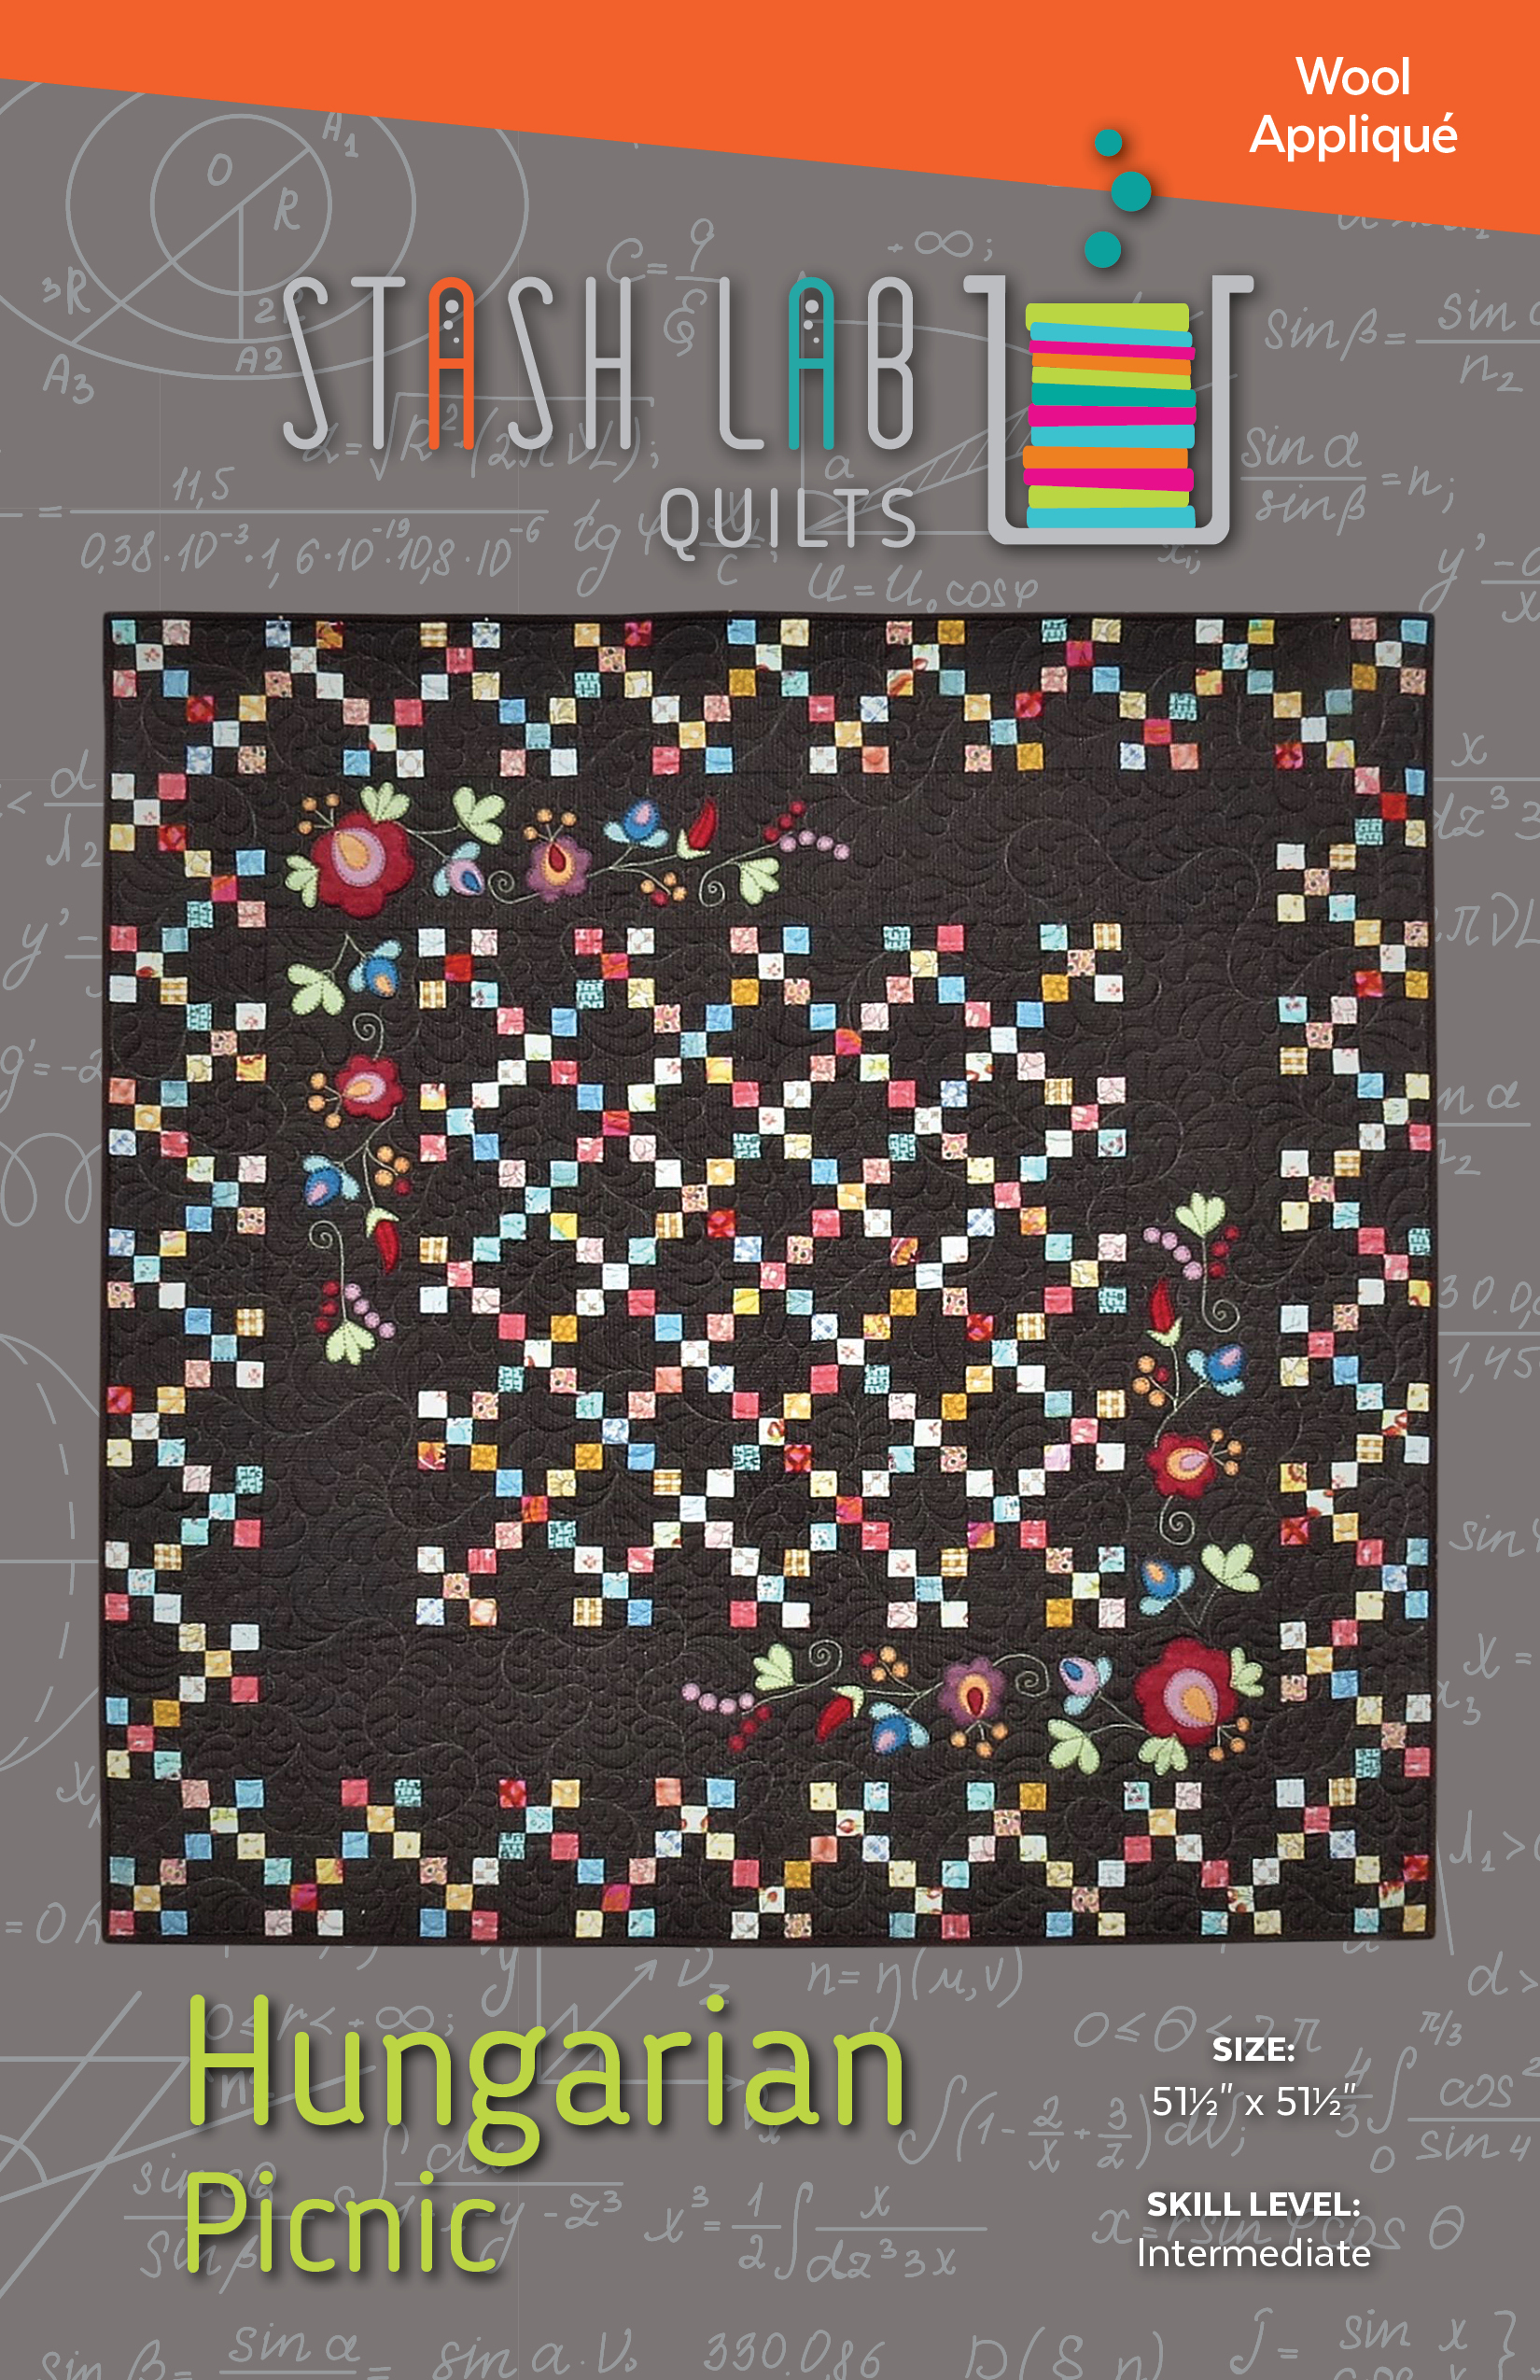
Whether you’re owned by a cat or just know someone who is, this book is full of adorable projects. One of the things I love about this book is the mix and variety of projects – quilting, appliqué, and embroidery. When it came time to pick one, I was thrilled to get to do one featuring wool appliqué because, well, Modern Wool, what can I say?

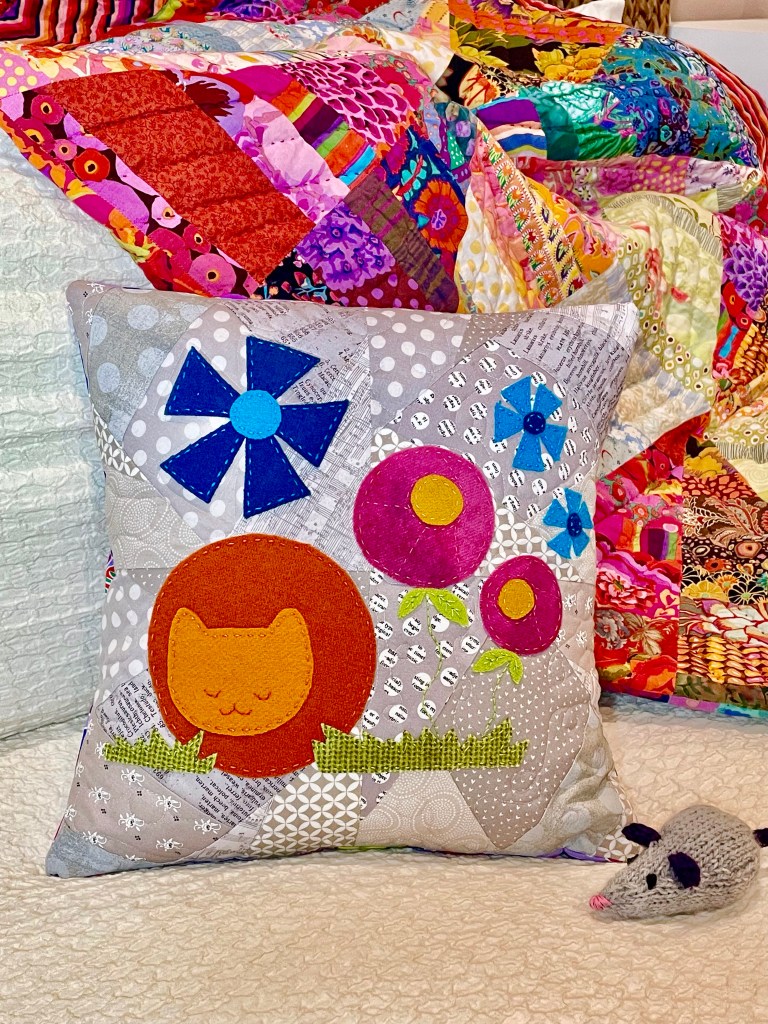
Here’s Pam’s version of the Cat Nap Pillow I chose, it’s delightful. Pam is multi-talented and she did all the photography in the book herself and it really is beautiful. Just imagining her setting up the photo shoots for all the projects is beyond me. When you see some of the settings you’ll see what I mean!

Cat Nap Pillow #1, photo courtesy of Pamela Morgan
Cat Nap Pillows 1 & 2, photo courtesy of Pamela Morgan

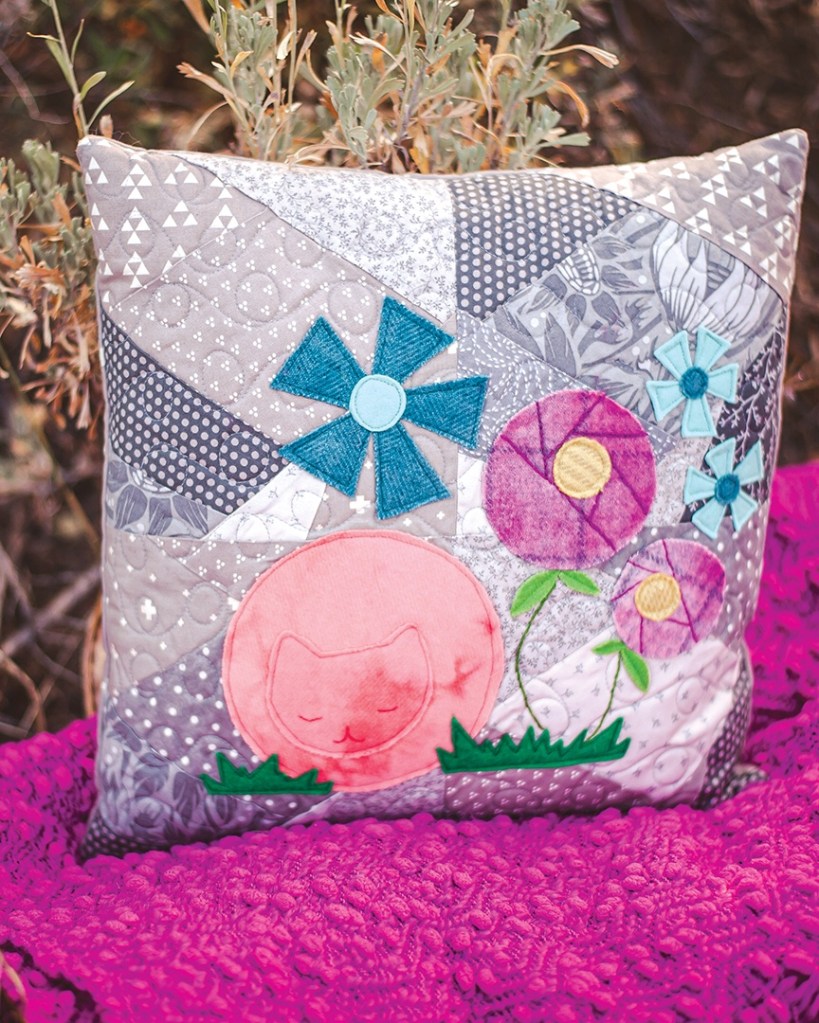
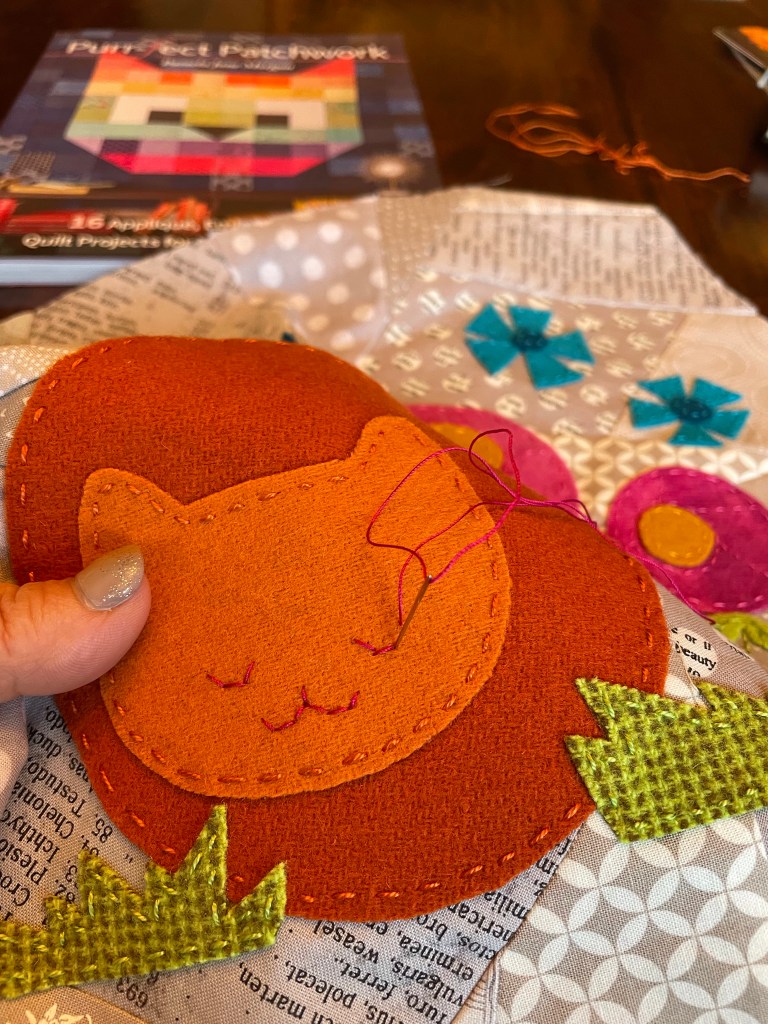
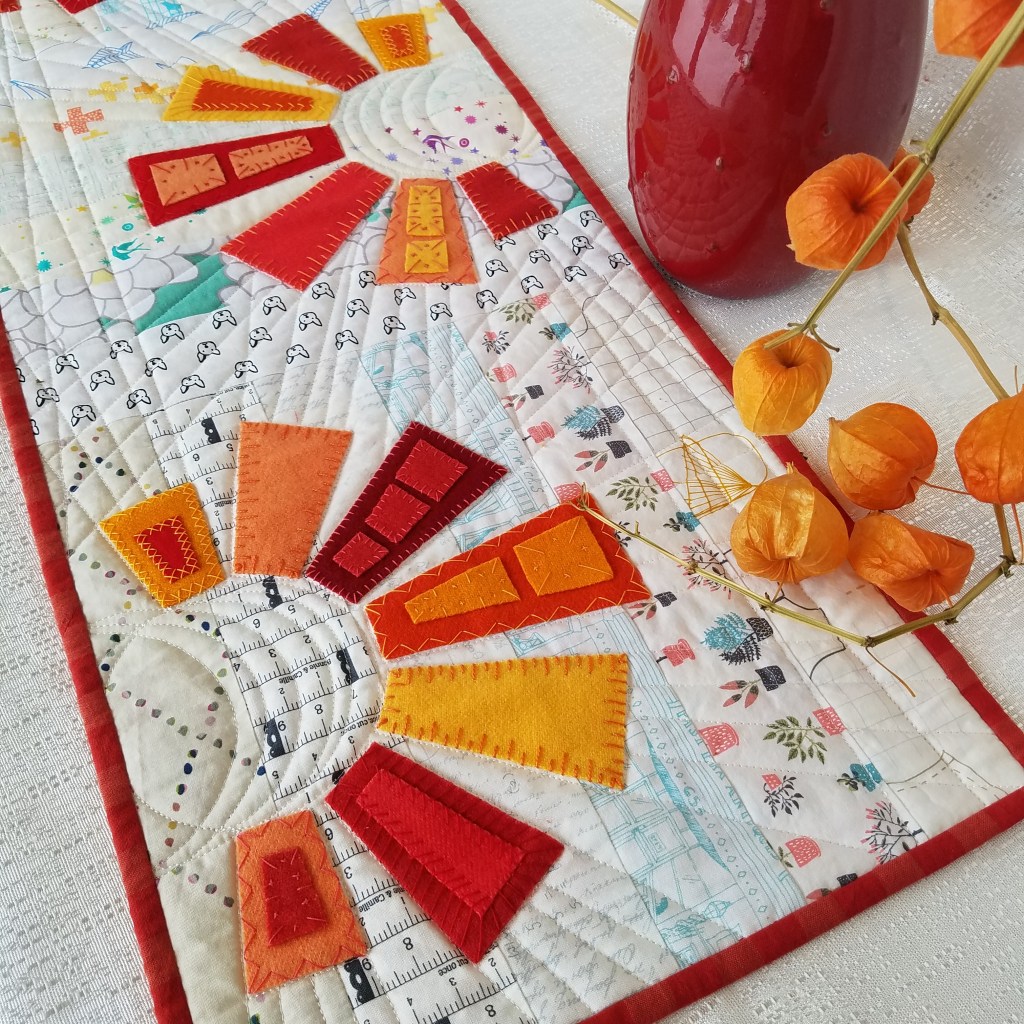
So The Cat Nap Pillow #1 it was! The scrappy low volume background was right up my alley of course and I had fun pulling those fabrics. And then when choosing my wool, I stuck with Pam’s original colors but went a bit brighter/darker only changing the color of my kitty. We have a neighborhood orange tabby visiting our yard so I went with two shades of orange for him.

There’s a Cat Nap Pillow #2 also but you’ll have to check out my fellow blog hostess Nichole Vogelsinger to see that one!

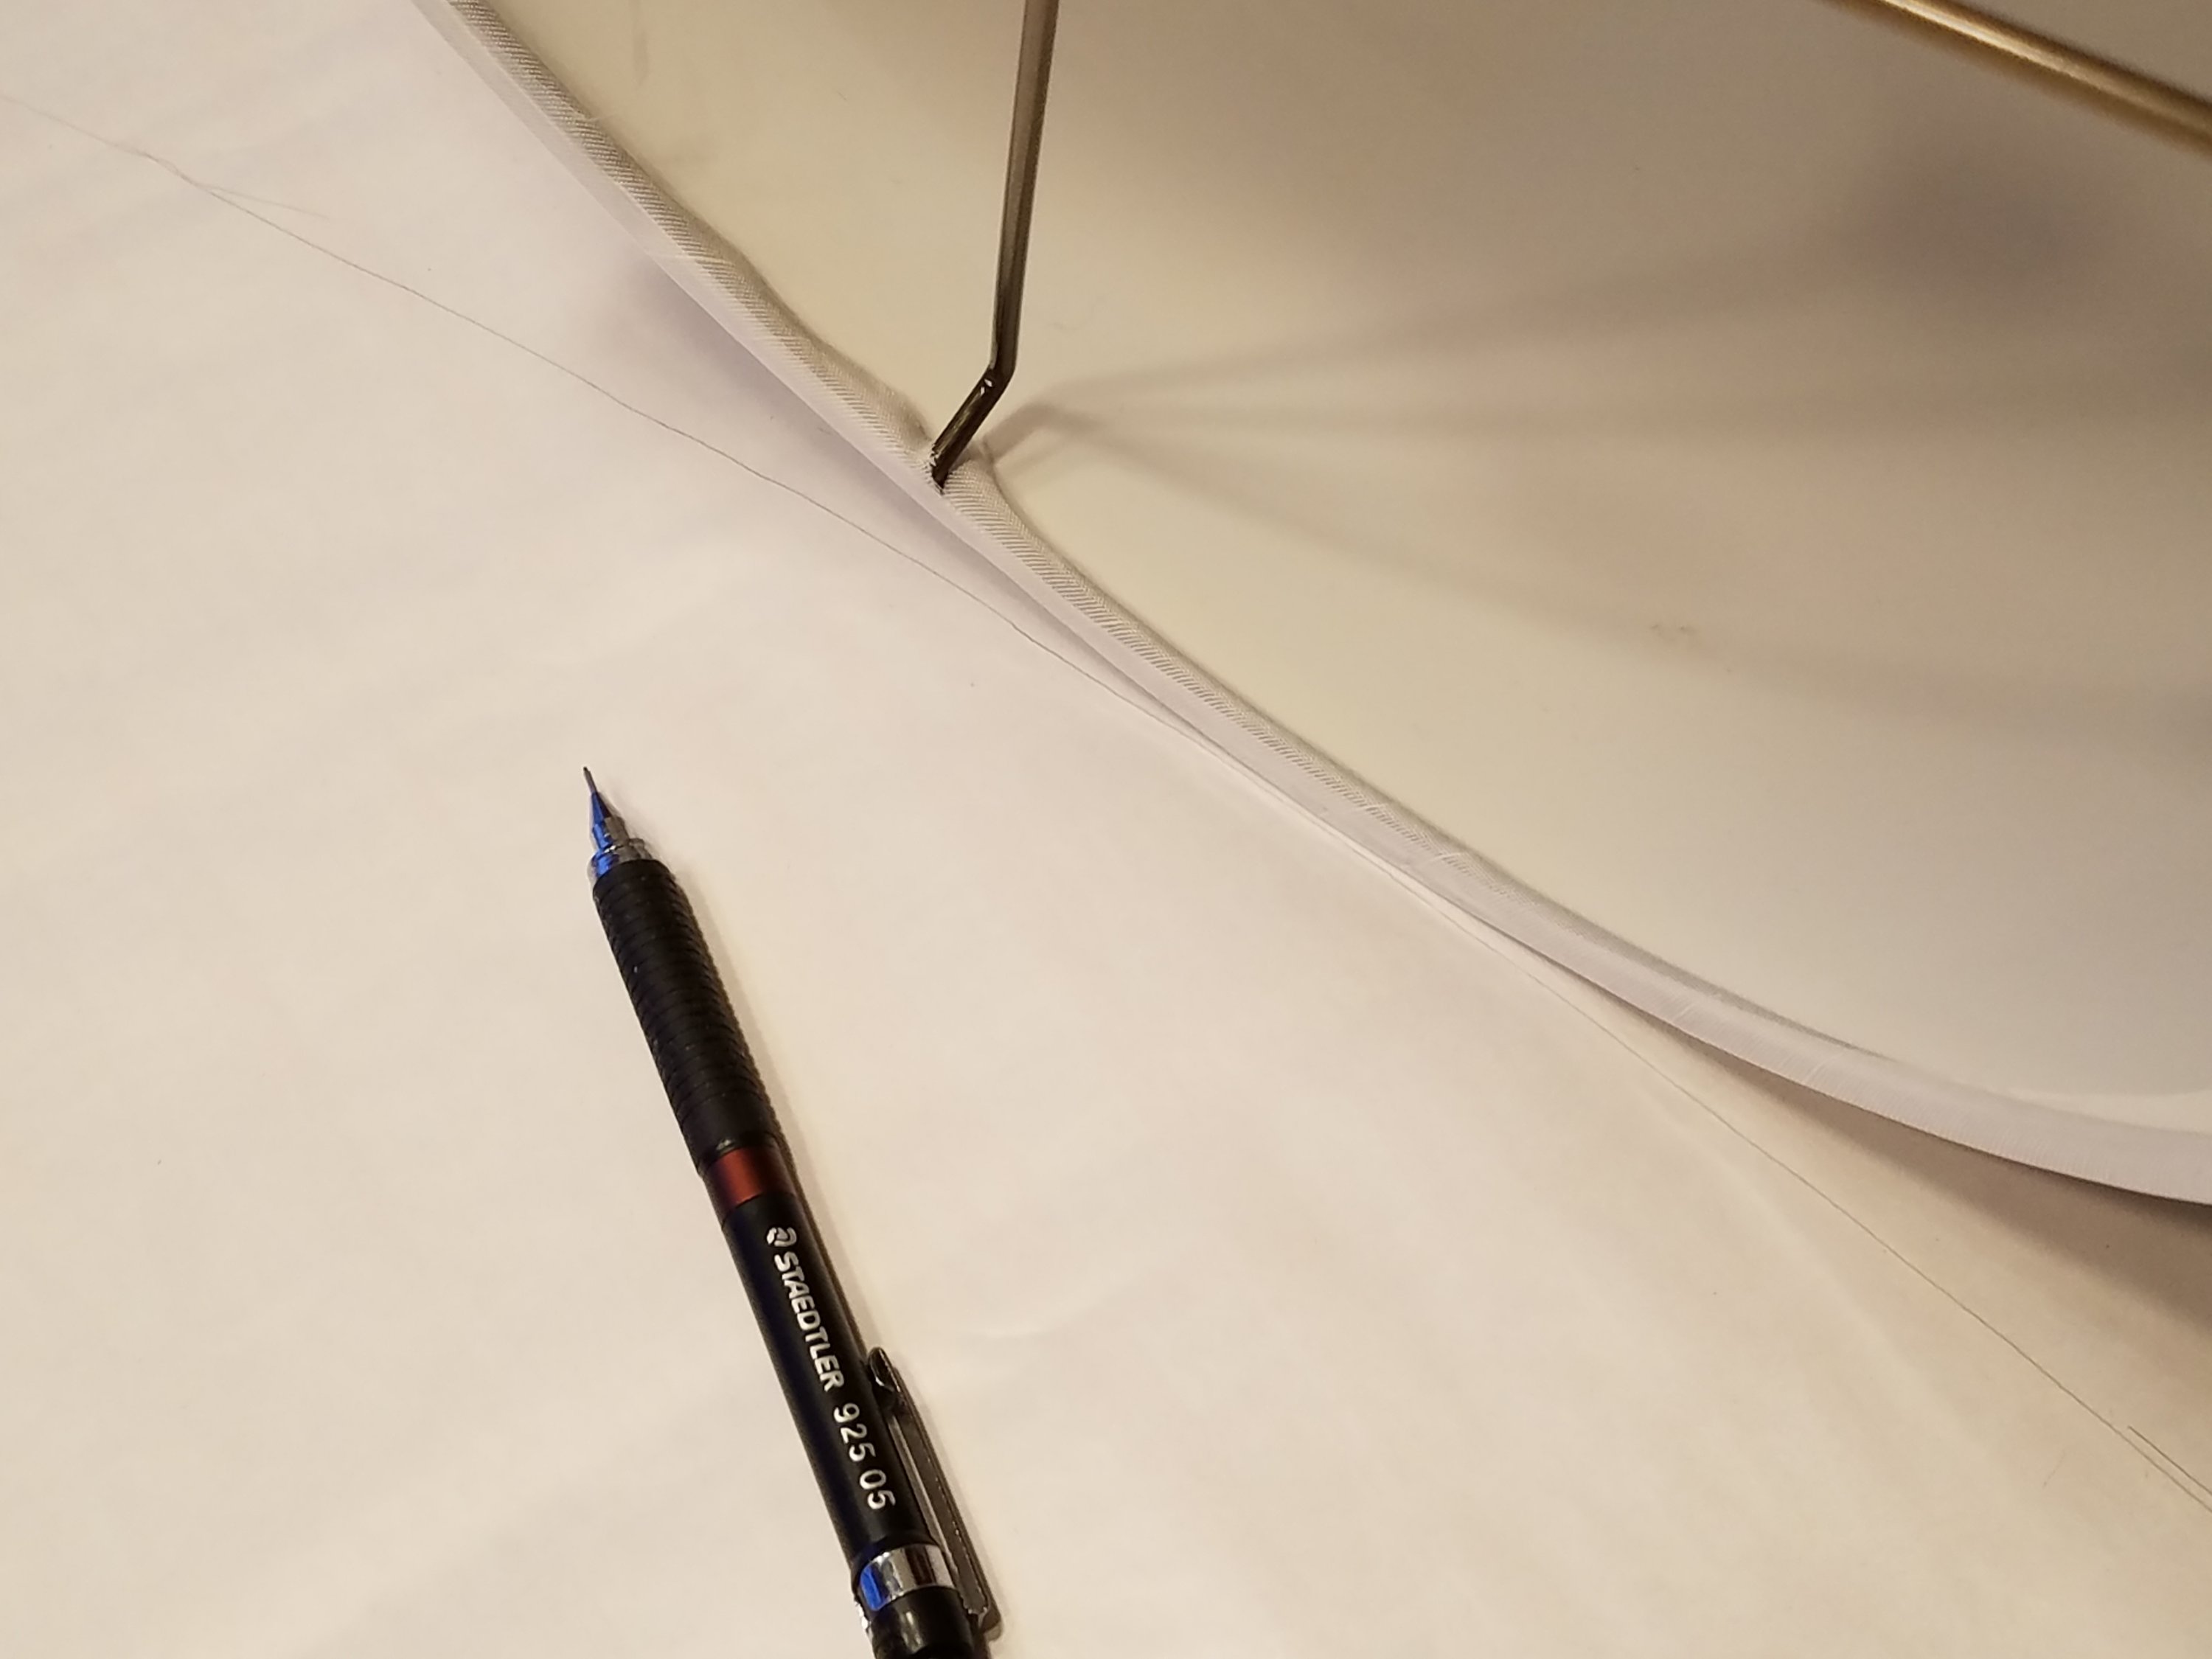
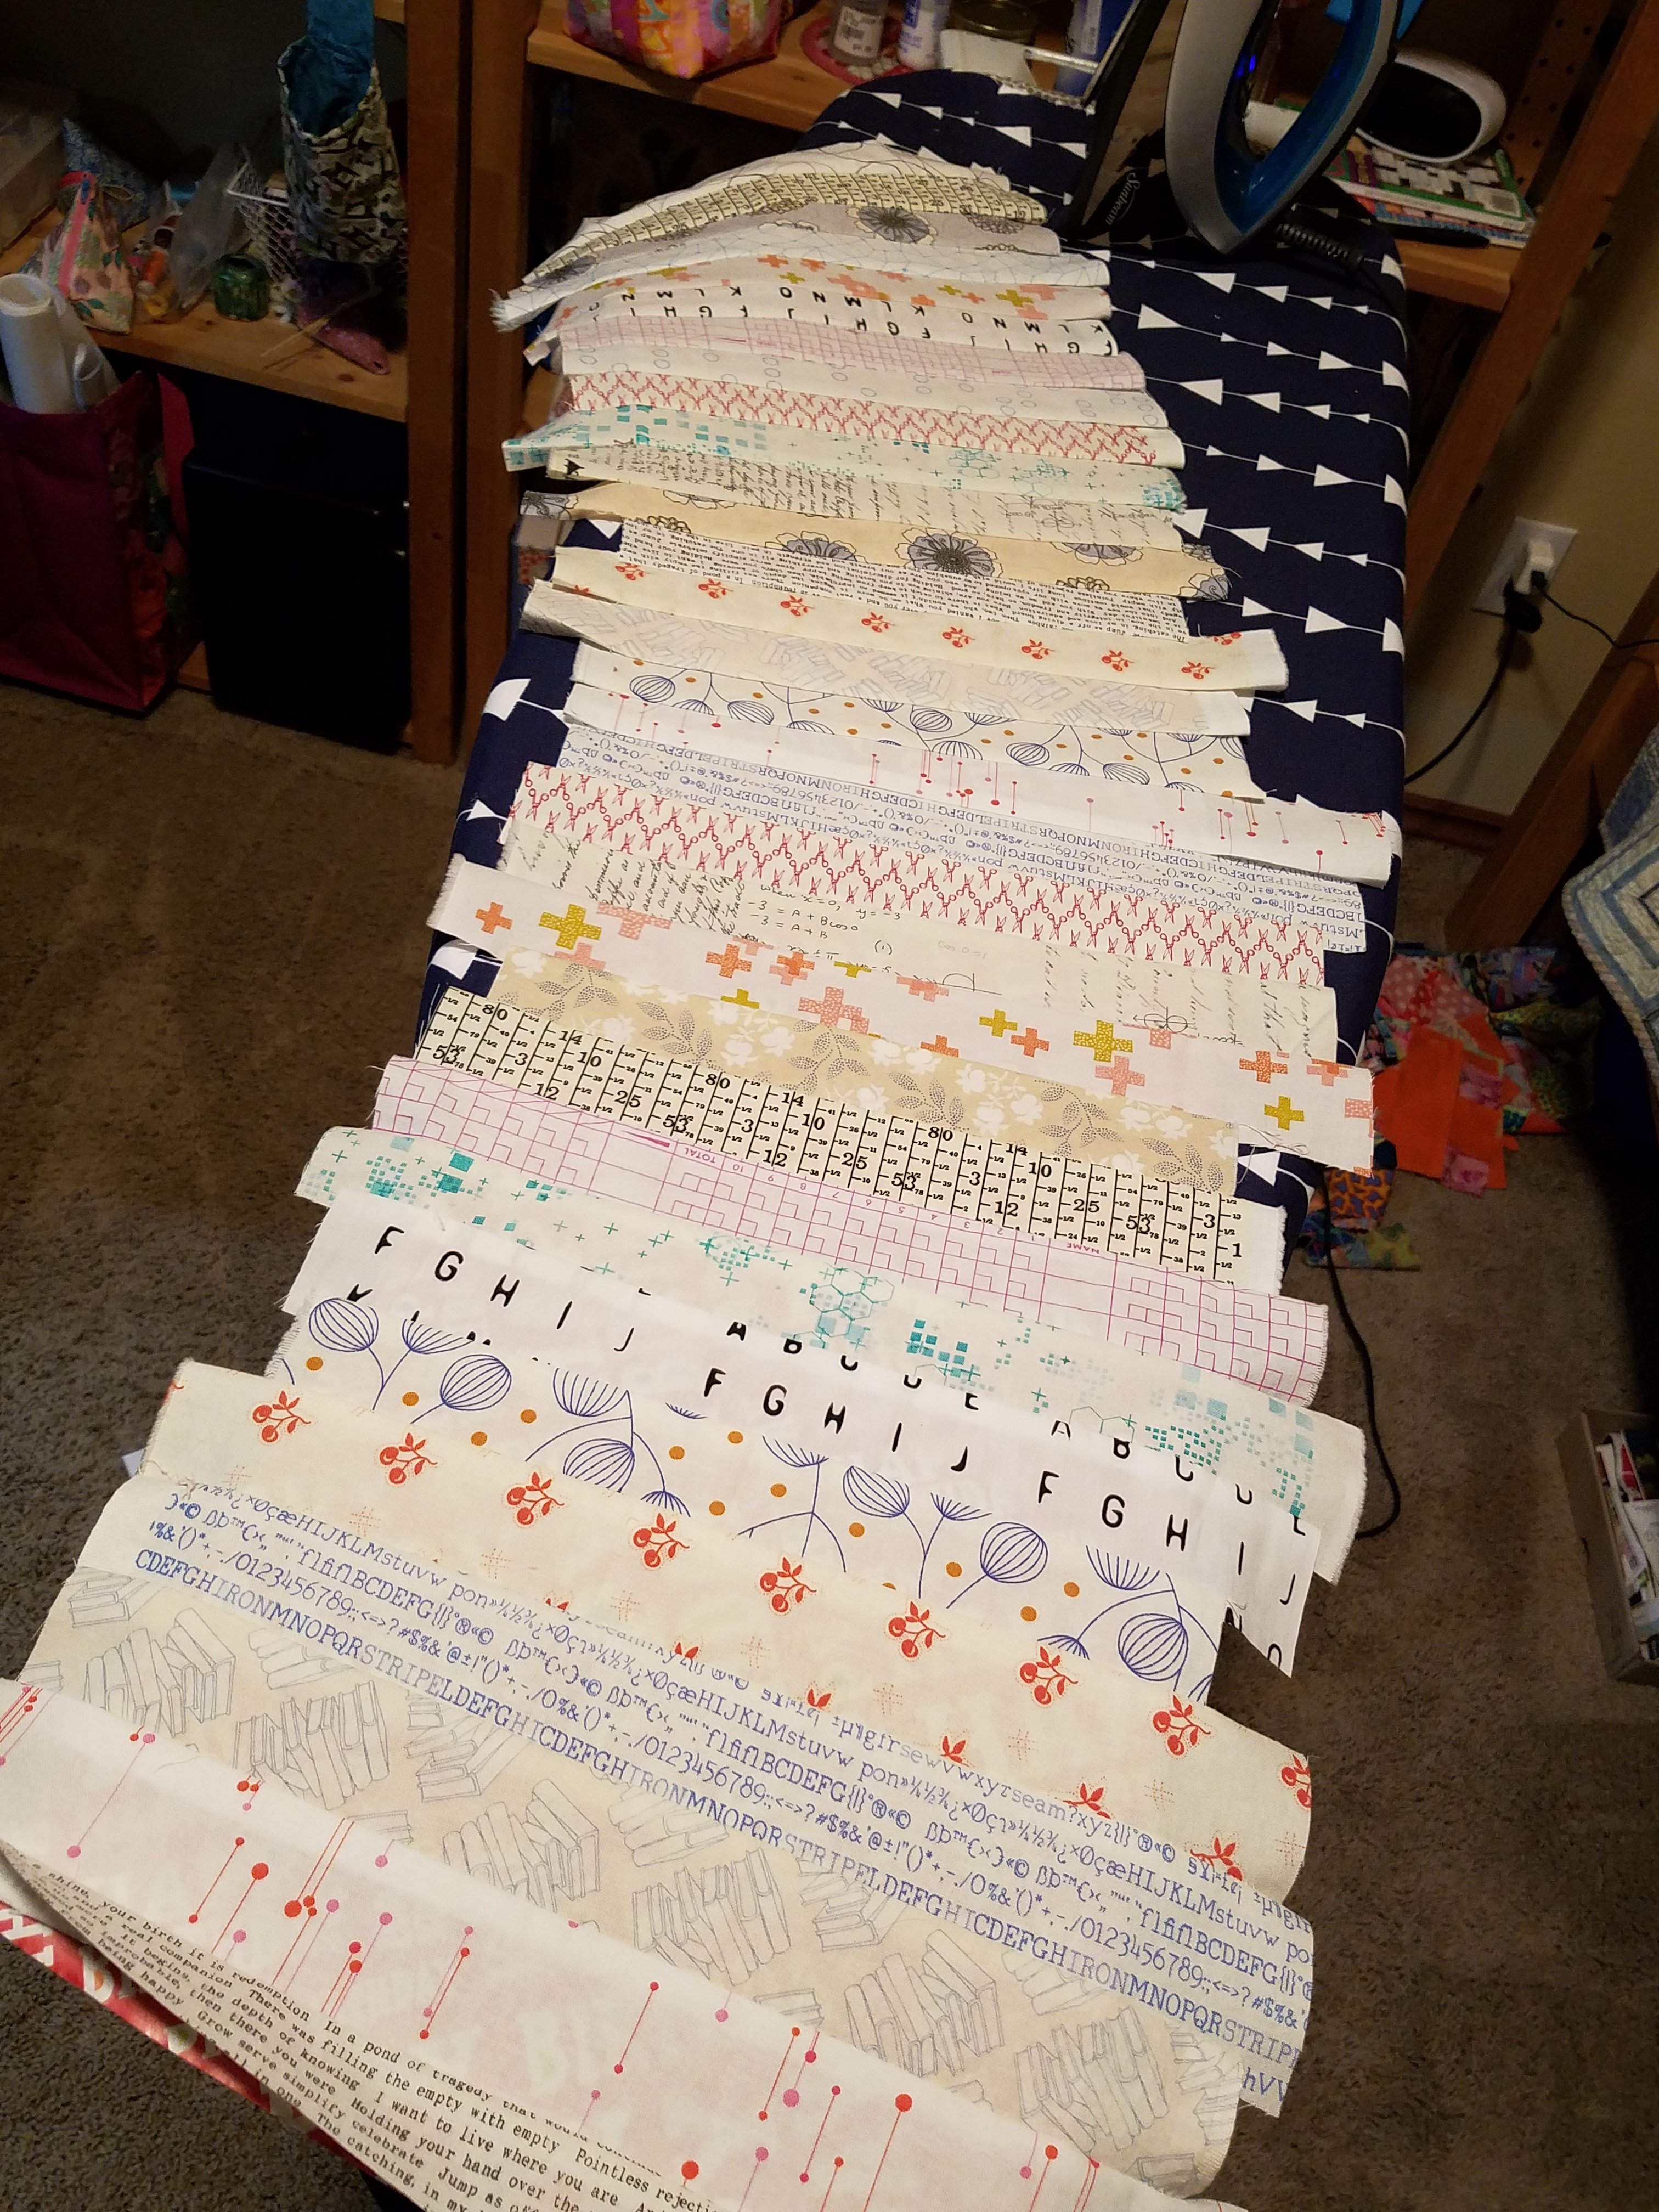
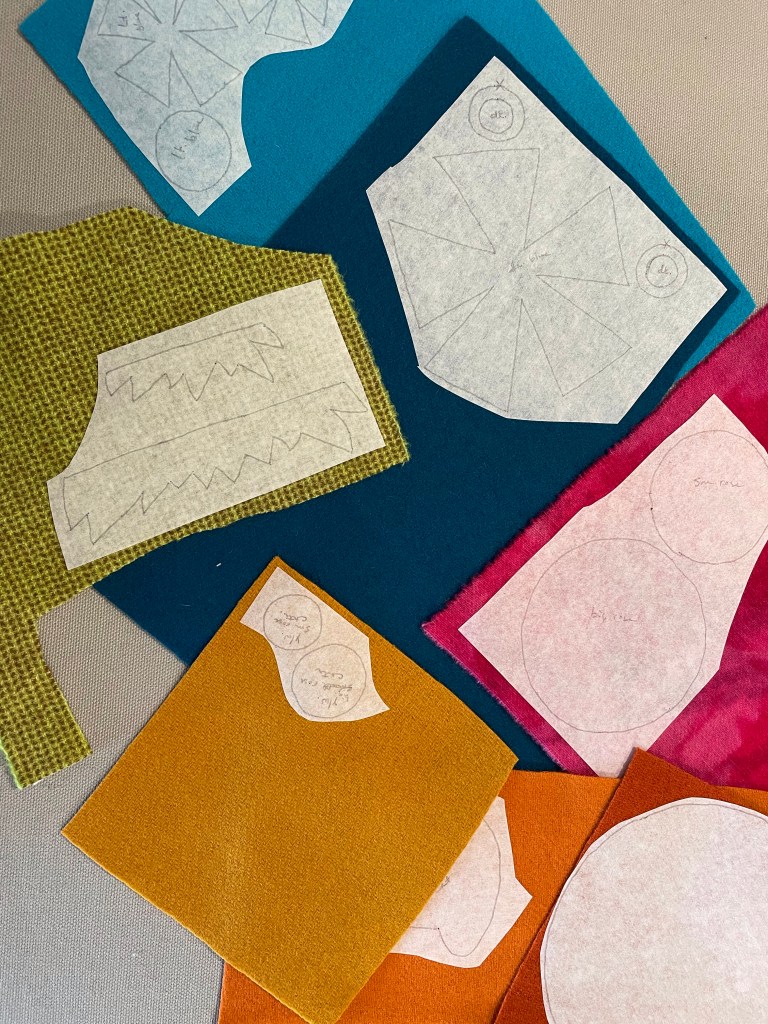
Here are my two quick tips for wool appliqué: first, when using fusible, group all the pieces you plan to cut from the same color close together when you trace your shapes like this…saves wool and helps keep you organized.

My second tip is to arrange your prepared wool pieces on the background on your ironing surface. This way you don’t have to risk your pieces shifting while carrying it from a table to your ironing board before they’re fused into place!

O.k., here it is! I think it turned out pretty good and it looks like it might have been made just for this spot in my studio. It matches that chair pretty purr-fectly! (I couldn’t resist.) I might just keep it there!

My version of the Cat Nap Pillow #1

A blog hop isn’t complete without some PRIZES so let’s get to it!

2 WAYS TO WIN

  1. To win an e-copy of Purr-Fect Patchwork, please leave a comment below telling me where you’re from and your cat’s name – or make up a good name for your hypothetical cat if you were to suddenly get one! ( No worries, the prize is an e-copy of the book, not a real cat!) Winners will be announced and contacted after the end of the Blog Tour, by August 30th.
  2. For a chance to win a grand prize bundle from Pamela Morgan you must visit each of the blog tour stops and comment. Pam has a grand prize bundle of goodies for one lucky winner! Including her book and a bunch of sponsor goodies you won’t want to miss!

Want to buy your own copy of Purr-Fect Patchwork? Shop Here!

Purr-fect Patchwork Virtual Tour Schedule

Fri. August 20:

C&T Publishing | http://www.ctpub.com/blog/ | IG: @ctpublishing

Pamela Jane Morgan (that’s me!) | pammiejane.com/blog | IG: @pammiejane

Sat. August 21:

Sherri Noel | https://www.rebeccamaedesigns.com/ | IG: @rebeccamaedesigns (Chasing Dreams Quilt)

Shannon Fraser | https://shannonfraserdesigns.com/ | IG: @shannonfraserdesigns (Stabby Tabby Pincushion)

Sun. August 22:

Lorna McMahon | https://sewfreshquilts.com/blog | IG: @sewfreshquilts (Get Your Paws Off the Tablerunner)

Tracy Brittain Loyek | https://www.purplekatzquilting.com/blogs/news| IG: @purplekatzquilting (Purr-fect Pocket Tote)

Mon. August 23:

Natalie Santini | https://sewhungryhippie.com/blogs/tutorials | IG: @sewhungryhippie (Hiss and Make Up Bag)

Kaitlyn Howell | https://knotandthreaddesign.com/blog/ | IG: @knotandthread (Ziggy Kitty Quilt)

Tue. August 24:

Audrey Mann | https://www.theclothparcel.com/blog/ | IG: @theclothparcel (Just Kitten Around Pillow)

Charisma Horton | https://charismascorner.com/ | IG: @charismahorton (Feline Floral Quilt)

Wed. August 25:

Mollie Johanson | http://blog.molliejohanson.com/ | IG: @molliejohanson (Tale of Two Kitties Needle Book)

Corinne Sovey | https://www.corinnesovey.com/home/blog/ | IG: @corinne.sovey (Tuxedo Cat Wristlet)

Thu. August 26:

Melissa Averinos | https://yummygoods.com/blogs/yummy-goods-blog | IG: @melissaaverinos (Blooming Curiosity Quilt)

Jeni Gaston | https://woolenwillowdesigns.com/blogs/jeni-s-blog-at-woolen-willow-designs| IG: @jenifergaston (Whisker Away Quilt)

Fri. August 27:

Tonya Alexander | http://stashlabquilts.com | IG: @stashlabquilts(Cat Nap Pillow #1)

Nichole Vogelsinger | https://wildboho.com/ | IG: @wildboho (Cat Nap Pillow #2)

Sat. August 28:

Stacey Day | http://www.staceyinstitches.com | IG: @staceyinstitches(Laser Cat Quilt)

Amanda Niederhauser |http://www.jedicraftgirl.com | IG: @jedicraftgirl (Self Pawtrait Softie)

So that’s it! I hope you’ll click through all the stops for your chance to win some great prizes from Pam! This project was so fun to make, the book is beautiful, and I’m sure you’ll love it!

Happy stitching,

Tonya

My version of Cat Nap Pillow #2, little knit mousy made by my friend Val!

Modern Wool has arrived!

It’s finally here! I’m so excited to have my hands on my first copy of Modern Wool: 12 Projects to Get You Stitching in real life and ready to share with all of you.

Earlier this week I did my first-ever video – opening the box on my first delivery! You can check it out on Facebook here. And a shorter version on Instagram here. Added bonus – Our lovable Winston joins me in the video, too. ❤️🐾

While you’re there, be sure to follow me on Facebook and Instagram. I’ve been sharing more photos and details there that don’t make it onto the blog. A quick glance of the blog posts will assure you that it is not my most frequent mode of communication!

One of the best things about this week with the book coming out has been the enormous amount of lovely comments and support I’ve gotten from everyone! You are all so wonderful and I can’t tell you how much I appreciate them all.

Self-doubt is the killer of creativity and I am definitely not immune. My quilt motto has always been to simply make what I love and love what I make but putting things out into the marketplace is next level when it comes to wondering what the heck I think I’m doing!

I’d love to share some wool inspiration with you in Modern Wool, to encourage you to give wool appliqué a try, or expand your ideas of what wool appliqué can be in your own projects. There are several ways to get your very own copy now!

  • Go to your favorite local quilt shop (or give them a call) and ask them to get you a copy! Ask them to stock it for your friends, too. They will appreciate your business!
  • Order it on my website – and let me know if you would like your copy signed!
  • Order it at C&T Publishing and check out all of the other great titles they offer while you are there!
  • You can also find it on Amazon – be sure to put in a review there, too!

With that, I’ll close out this post with another thing I enjoyed this week – this beautiful congratulatory delivery from the kind and creative folks at C&T. Thank you for everything!

Happy stitching,

Tonya

Pre-ordering for Modern Wool!

“Thrive”, table runner

We’re a step closer! I’m happy to share that you can now pre-order your copy of my upcoming release of Modern Wool: 12 Projects to Get You Stitching right on my website. If you’d like a signed copy, be sure to drop me note in the comments on your order. Anticipated date is currently March 25, 2021!

You can also pre-order a copy directly with C&T Publishing or – and this is a BIG ONE – go to your favorite local quilt shop – ask them to preorder a copy for you and help support their shop! There are so many ways to use your consumer dollars in important ways, especially now while so many small businesses are struggling.

There are 12 projects, but there is a double bonus because I featured both a low-volume and a dark version of every project! Thinking about how we see color and how colors appear on dark or light backgrounds, all became part of my exploration of wool along with combining wool with modern, mixed cotton fabrics for all of the backgrounds. I think it’s fascinating how the exact same color in the applique shapes can change appearance, all by just changing the background! Here’s an example of what I mean:

“Rest”, throw pillows

This is the project called “Rest” in both the dark and light versions. It’s my take on traditional penny wool projects and the wool pennies are exactly the same in both versions. The only difference is in the background fabrics I chose. Colors can appear to recede or advance with a simple change in the background creating so many wonderful design opportunities in your projects! Here are some more quick images of some of the projects:

“Gather”, table topper
“Play”, needle book
“Rise”, table runner
“Dwell”, house sampler

I’ll definitely be sharing more images and details about each of the 12 projects as we count down to publication but most importantly wanted to share that you can now pre-order your copy now.

Be well my friends and happy stitching,

Tonya

New book release for 2021!

Let’s just pretend 2020 never happened, o.k.? I am only looking forward – and to the most exciting thing – a new book release coming in March 2021!

I couldn’t be more excited to share my newest book project with you. It’s bright, it’s beautiful, and every project just makes me smile!

Reinvent wool appliqué with bold projects

Take wool appliqué and make it bright, bold, and modern. Contemporary quilters can now experience the joy and satisfaction of working with wool and traditional quilt blocks and techniques, but with a fresh twist on color combination and design choices. These 12 projects are made with beginners in mind and include helpful step-by-step commentary. Beautiful, forgiving, mobile, satisfying, a few of our favorite things about wool hand appliqué projects. 

  • 12 projects each with two colorway options (light and dark backgrounds)
  • Modern aesthetic for table runners, wall hangings, pillows, needle books, pincushions, and more
  • Perfect for wool appliqué beginners! Includes tools, techniques, and tips

Modern Wool: 12 Applique Projects to Get You Stitching is being brought into the world with my partners at Stash Books and C&T Publishing and will be available at the end of March 2021. Pre-order information will be available soon!

Be well friends,

Tonya

Scrap resolutions

Happy New Year! Are you starting off your new quilting year off with a resolution to use up your scraps? Or maybe just get to some of those lovelies that have been living in your stash and are looking for the perfect project? Great! Because String Theory 2.0 is here!

String Theory 2.0. is the second issue of the Lab Manual series and features projects that are made for 1 1/2″ wide fabric strips, or sometimes called strings. String quilts have been around for a long time and have been a favorite of scrap quilters for ages. I love them and they are one of my favorite standard scrap bucket sizes because you can do so much with them!

2.0 offers six new projects, all based on 1 1/2″ strips, and this time around, some of the projects add in the A-word. Yes, appliqué! Now don’t be afraid! It’s not scary appliqué I promise and all of the projects will burn up a serious amount of scraps! Be brave!

Now, winter weather and my schedule have not been great for getting a lot of outside quilt shots but I did luck out with a recent sunny day and ran out to put up my project “Happy Lattice” out in the garden to catch the sun. Beautiful quilting on this one by Tracey @thequiltingninja .

I had so much fun bringing these projects together and I hope you will find something that tickles your scrap fancy. To help start you off on your scrap resolutions, I’m offering free shipping in the U.S. on all on-line orders of String Theory 2.0 for the month of January! Yeah! No discount code needed, just shop an go!

And of course, your support and purchases are always appreciated at your favorite local quilt shop. String Theory 2.0 as well as all of my other patterns and books are available to shop owners through their distributors.

If you’re in my Pacific Northwest neighborhood there are some upcoming workshops and trunk shows featuring these new projects so check them out!

Are you a member of the Northwest Quilt Connection? I’ll be visiting NQC, Saturday, January 11th and I’ll be sharing a trunk show program. See their site for more details.

Upcoming classes at Two Thimbles Quilts Shop in Bellingham:

Saturday, February 8th I’ll be teaching the Flora runner.

Sunday, March 1st, Walking Foot Quilting.

Sunday, March 29th I’ll be teaching Petal Pusher.

Another great opportunity coming up in January, February and March, will be Scrap Science Club at Quilting Mayhem in Snohomish.

Well, my year is off with a dash and I hope yours is too! More soon!

Happy new year’s quilting,

Tonya

Two new for wool!

Hello December! I can hardly believe it! Time to catch up on some new pattern details…and a SALE! First up is Deco Rose, one of my latest patterns just recently introduced this Fall.Deco Rose cover frontDeco Rose features wool applique on cotton background – and my favorite – two background options: low volume or dark prints – this time using a mix of 5″ charm squares. Same applique pieces, completely different look! Of course, if scrappy is not your style, pattern includes option for single fabric background. Make it your own!

Deco Rose can be a quick-make – even with hand stitching! – and could easily be made as a gift for someone special for the holidays 🙂 I can’t say that for all of my crazy-scrappy projects but it’s true for this one!

My second new(ish) pattern featuring wool applique is Hungarian Picnic!Hungarian Picnic cover front

This pattern has a special place in my heart because it was inspired by my home-away-from-home country, Hungary, and the wonderful people there. This pattern originally appeared in Quiltmania’s Simply Vintage in Summer 2018 and is now available as an individual pattern.

HP_1
A-mazing quilting by Tracey @thequiltingninja 

The image above is the same quilt, just different lighting! Some projects you know you will just keep forever, and for me, it’s this one for sure.

And guess what? For the next 48 hours, I’m having a pattern sale in my shop just in time for Cyber Monday as a small way to say thank you for all of the wonderful support and encouragement you’ve given me this year. All individual print patterns are 25% off and ship for FREE in the U.S. – including Deco Rose and Hungarian Picnic! Just use coupon code “Thankful2019” at checkout. Sale runs through Tuesday, December 3rd.

Happy holiday quilting,

Tonya


Quilt Market re-cap & recovery

20191028_0916341871885129549753440.jpg

Quilt Market is the quilt industry trade show that happens twice a year, fall always in Houston Texas followed immediately by the Quilt Festival, and each spring in a changing location. This was the first time I had my own company booth at Fall Market and it’s pretty daunting when you are a one-woman company! Fortunately, I have lots of support from friends, professionals, and my go-to guy, my husband 🙂

So much effort, energy, business, and at the end of the day, fun. It takes a bit to get back to normal! Here’s what you start with…20191028_1626472313150095825871148.jpg

Not very inspiring, is it?! Everything else has to be hauled, shipped, rented, or bought on site. To make something wonderful, where people want to be and ultimately buy. This is a business after all and if you don’t make money, you can’t make more patterns, quilts, fabric, books, or whatever you have to offer.

Some shots of my booth after setup…20191026_0905011191069875788962882.jpg

img_20191026_130421_9395775290279790974479.jpg

img_20191026_130421_9632900443156523833334.jpg
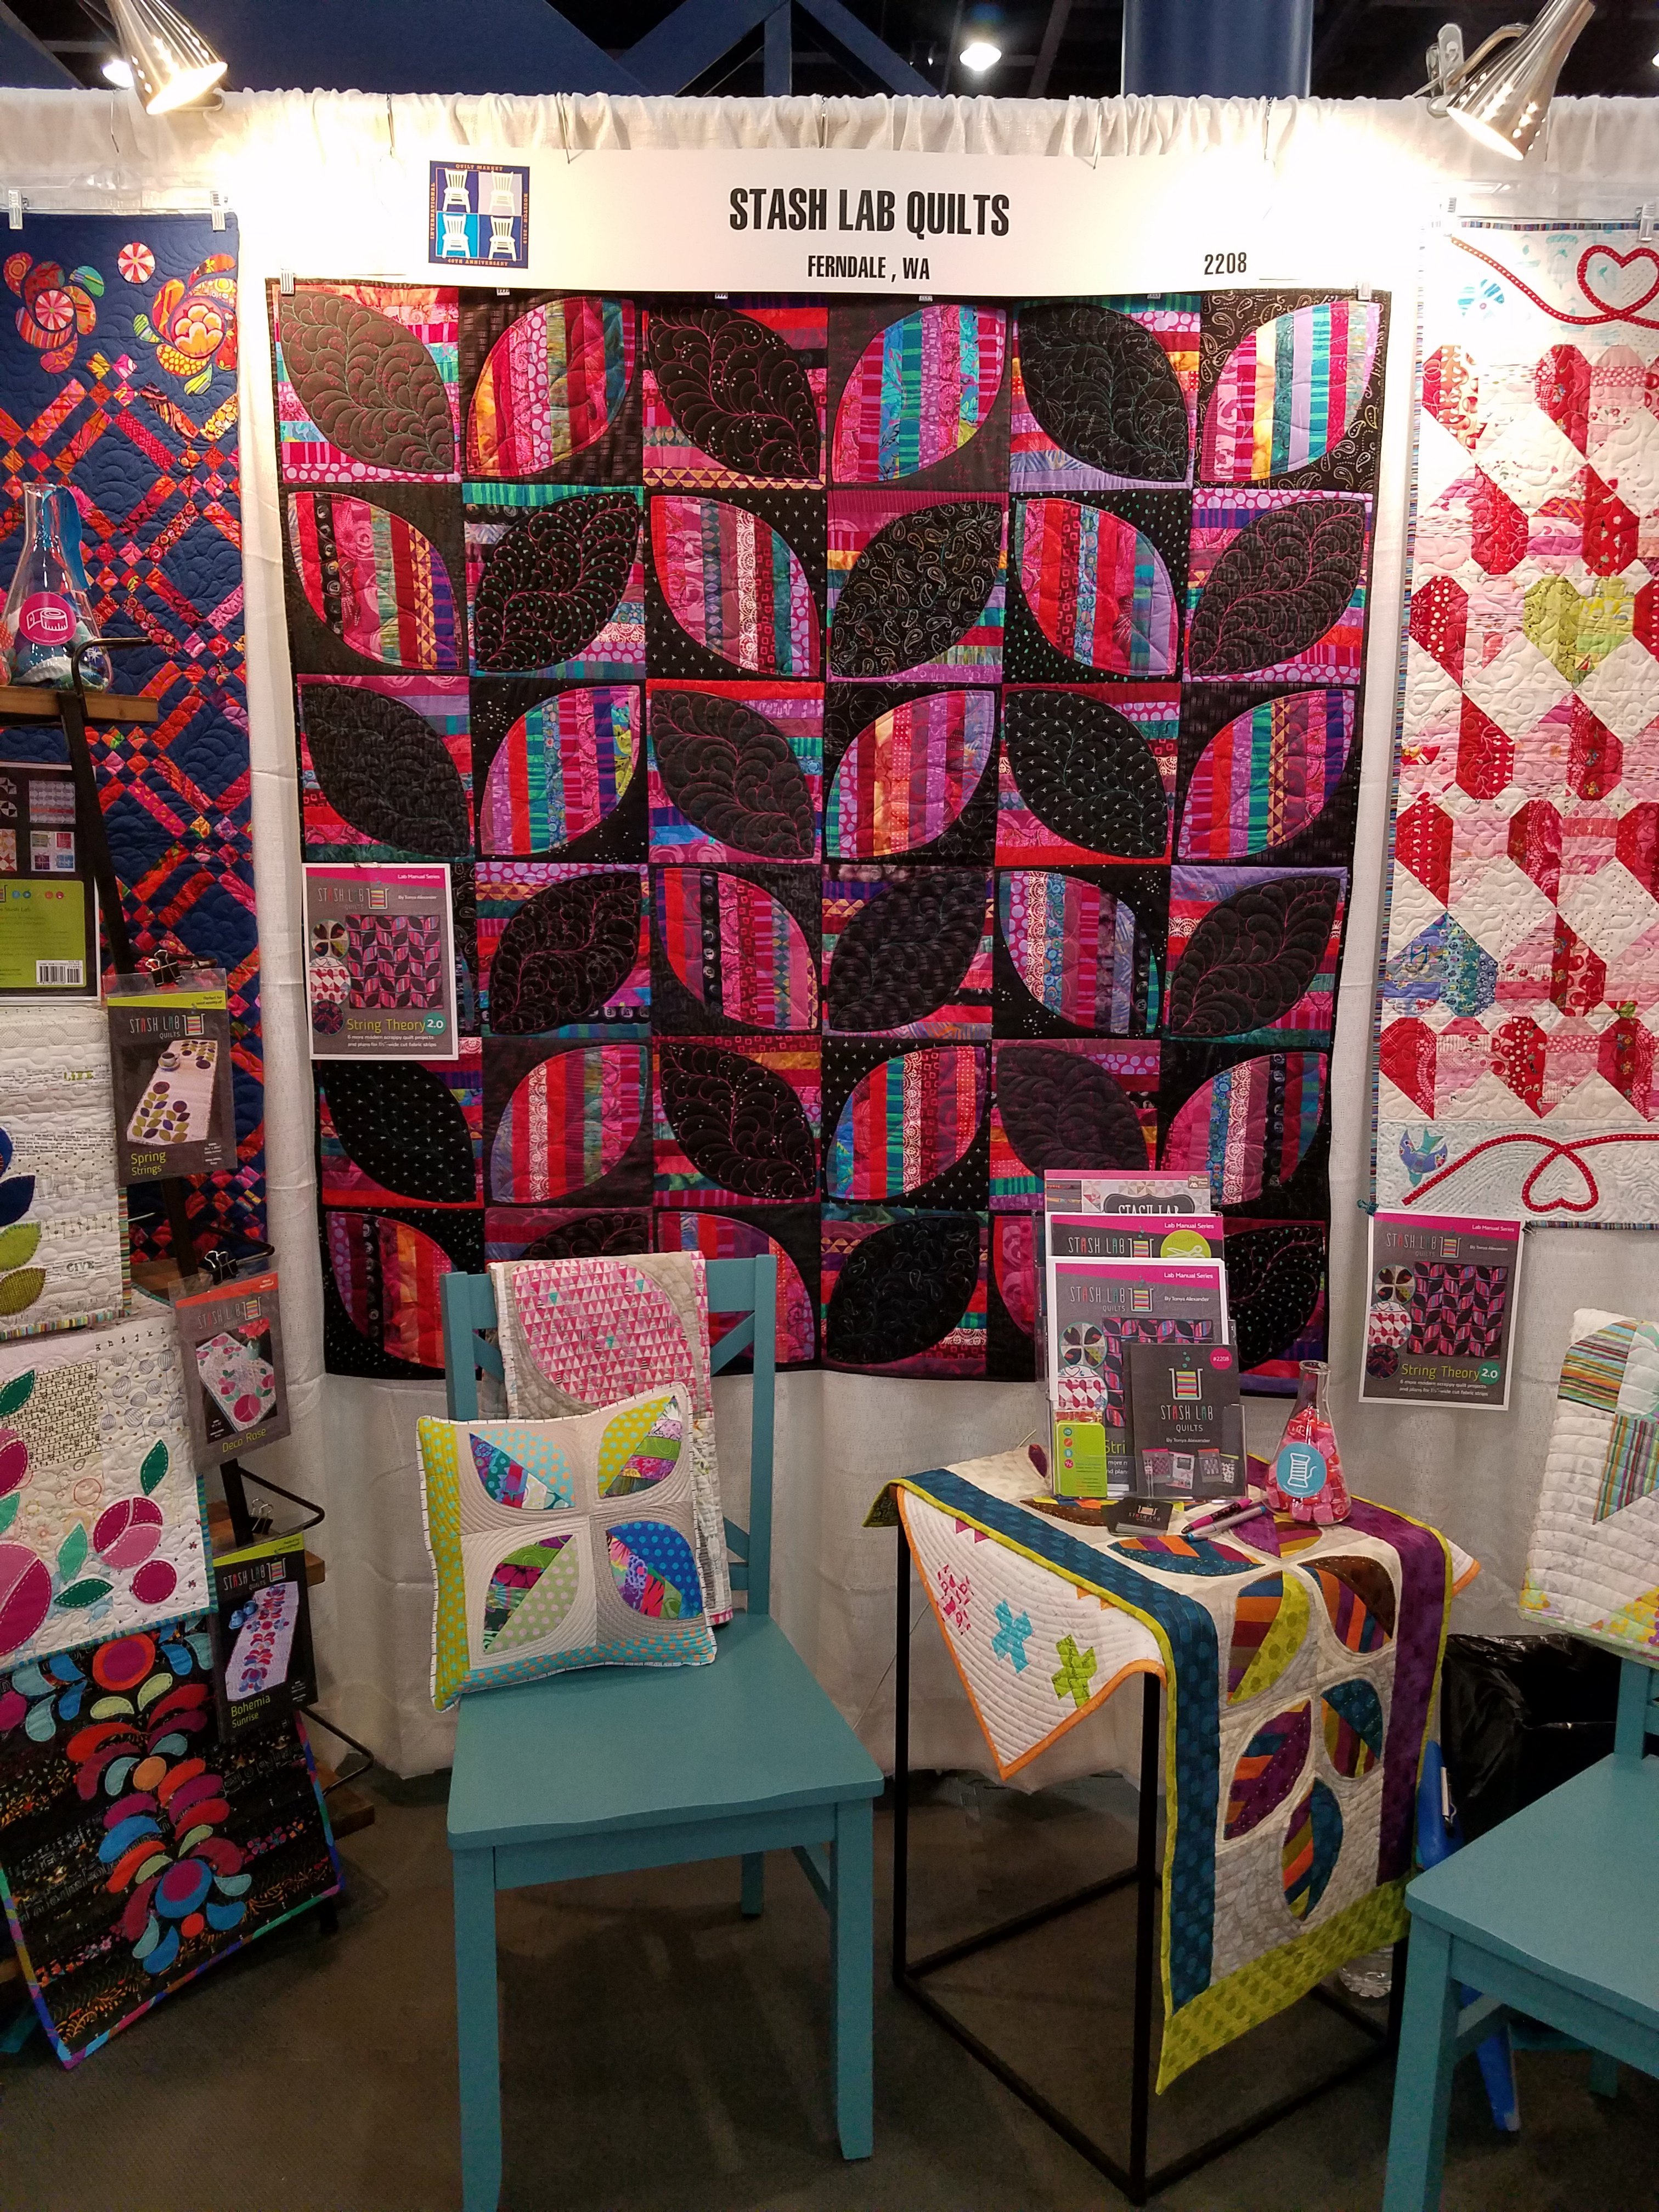
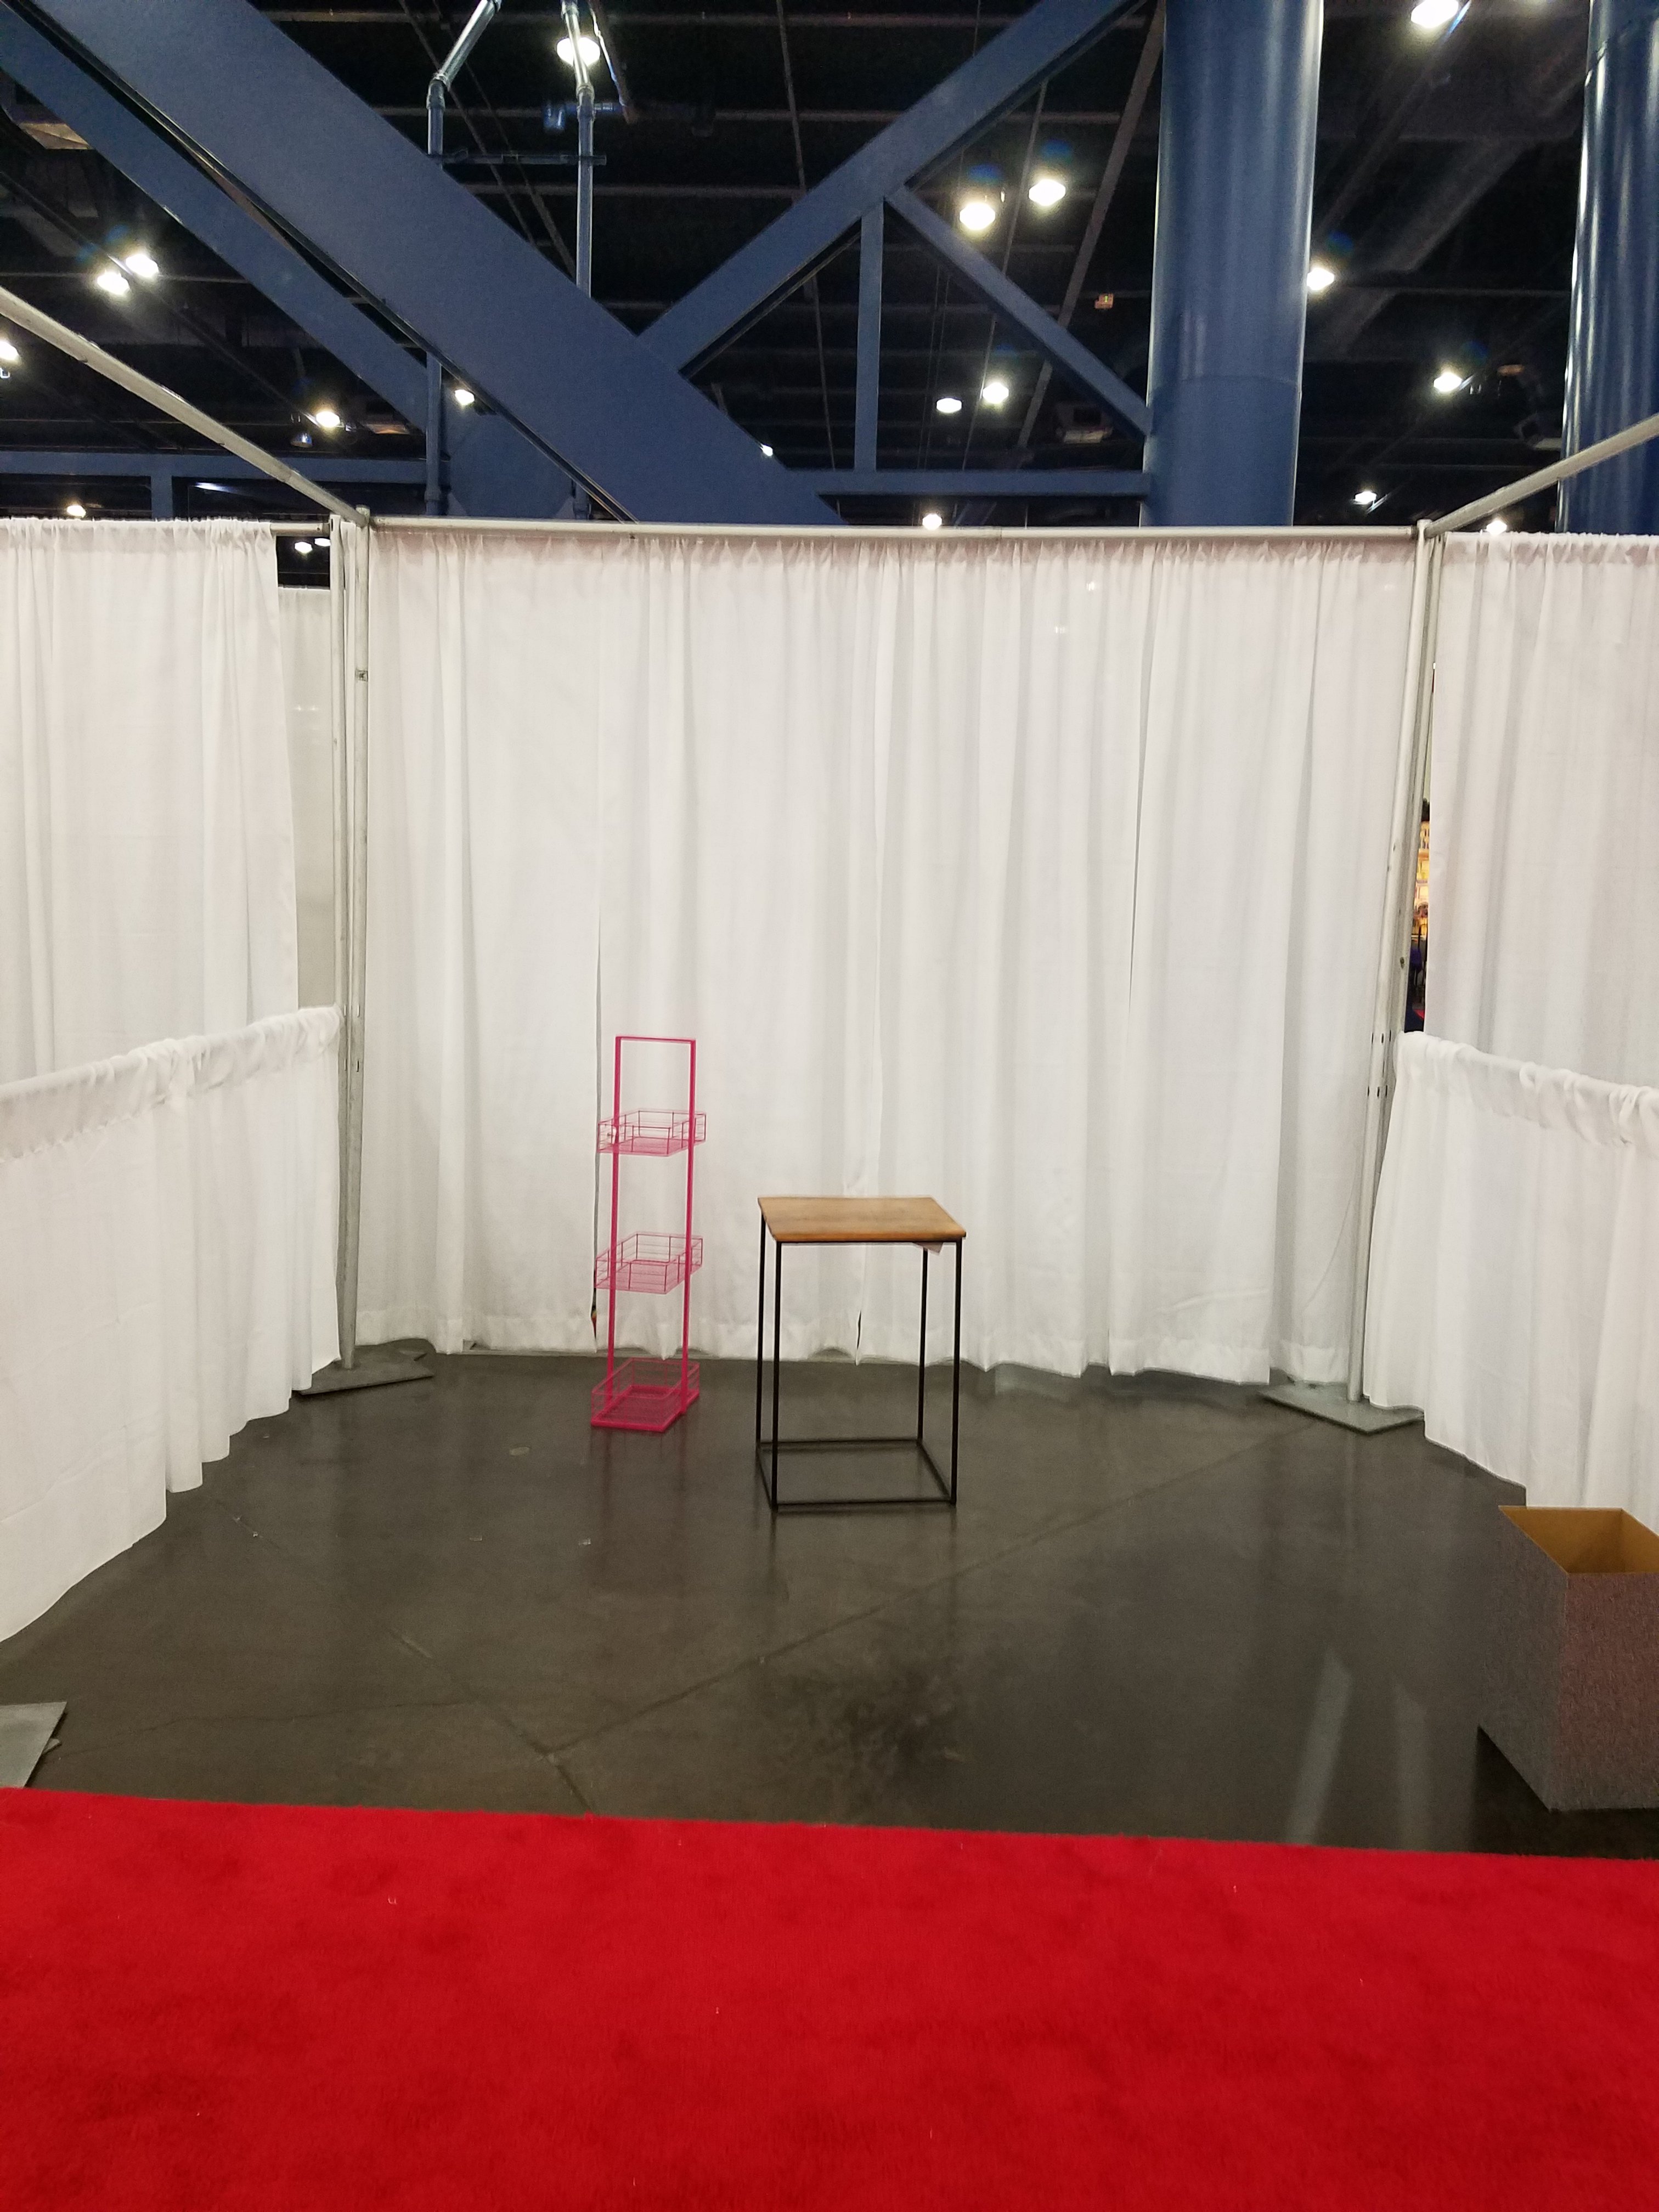
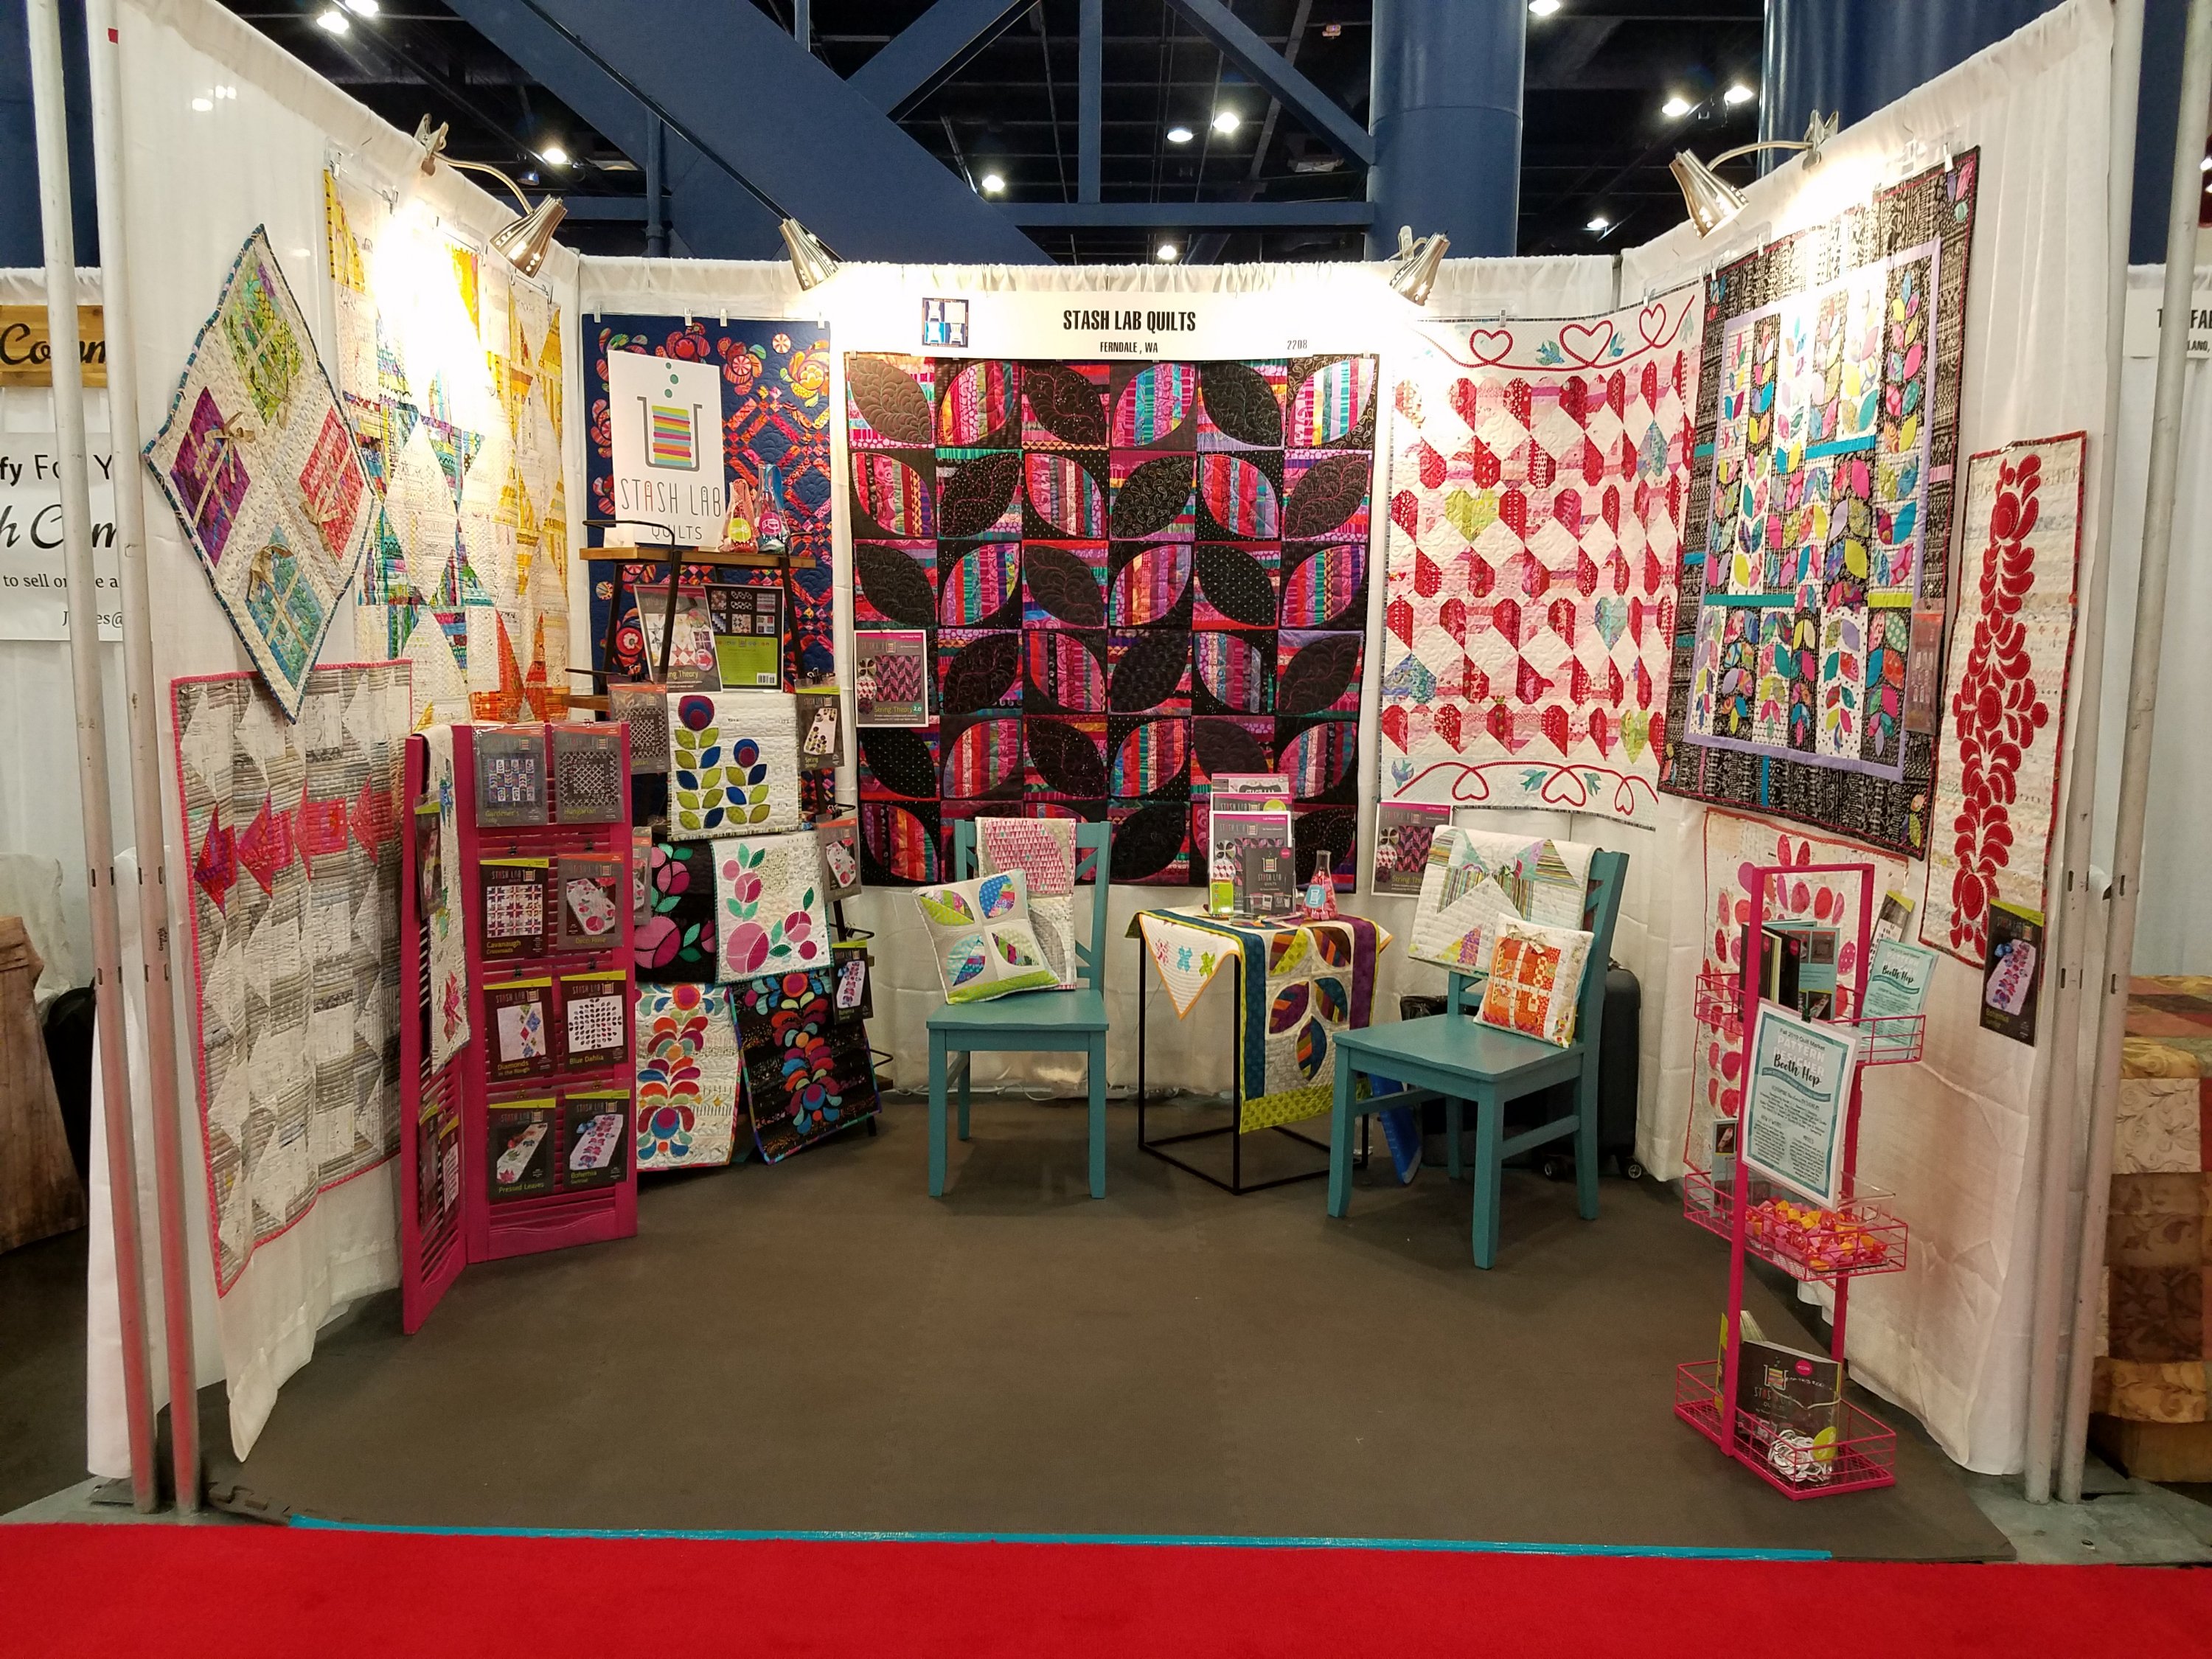
One of the downsides of having your own booth is that you actually have to be in it – all the time! Which makes it hard to get out and around to see other booths and all of the other sights. It’s kind of a trade off in many ways. So I did run around the show in the mornings before the floor opened. At the end of the day, I’m just too tired to even enjoy. Here was the view from my booth – business was hopping!img_20191026_130421_9467458333198870884729.jpg

Besides the opportunity to meet lots of new industry faces and catch up with friends and business partners from before, I introduced three new patterns and the second installment of the Lab Manual Series, String Theory 2.0, which are now available to shops and directly on my site as well. More on those soon but they are all now available!

And before you know it, it’s over and everything comes down in a flash! Just like it never happened…

20191028_15305976475435058652491.jpg

After the wheels touched back down on the runway in Washington State, I hit the road for my last two travel teaching/speaking trips of the year – and now, THANKSGIVING! How can that even be possible?!

Happy quilting,

Tonya

Drumroll please…

O.k. o.k. o.k.! So excited (and mildly stressed out – in a good way!) The countdown is on. This time next week I’ll be opening my booth at the Houston International Quilt Market 2019 and introducing my newest patterns and offerings to quilt shops, distributors, and retailers alike including…..String Theory 2.0!!!Lab Manual Series 2 coverv2

Quilt market runs October 26-28 before the International Quilt Festival in the Houston Convention Center (everything really is bigger in Texas – this thing is gigantic!). It’s the industry trade show for everything quilty – fabric companies, pattern designers, notions, distributors, retailers, publishers, and every auxiliary industry you can imagine.

Like most things, I’m working towards this with my hair on fire! I sure can’t do this alone – HUGE thanks to the consummate professionals and friends that make my designs come to life: long-arm quilter and thread whisperer, Tracey Fisher, graphic designer extraordinaire, Lindsie Bergevin, and keeping me honest, my much-needed technical editor,  the awesome Elizabeth Beese. With their efforts, here’s a peek at some of the things I’ll be introducing there!

brochurefront-1.jpegbrochureback

If you are a retailer attending Market, please stop by my booth #2208 and say hi! I would love to meet you. My booth is in the LAST row of the show floor (or maybe, the first, depending on where you start!) Let’s just call it the end row – and the easiest to find!

You can also pick up your passport for the Pattern Designer Booth Hop – a fun way to discover some great independent designers and a chance to win PRIZES! Who doesn’t love that?

boothhop_socialmediaimage

If your not a shop owner but your favorite local quilt shop peeps will be attending – send them my way and let them know what you’d like to see in their shops. You can be there in spirit and have them bring something home for you 🙂 Your support is soooo important and they appreciate your business!

I promise more feature posts on the individual new patterns and the new Lab Manual – String Theory 2.0 after market. (I heard some of you may still have a few scraps laying around so it was necessary!)

To be sure to get the latest updates from Market – follow me on Instagram @stashlabquilts and also follow the tag #quiltmarket2019 for great posts from everyone on the show floor.

Next stop, HOUSTON!

Tonya

Summer Lab updates

September, here we come! What a busy end to summer! Just a few quick updates about what has been going on here in the Stash Lab…

Studio space in the house has been under construction and I’m almost moved in! Actually, I’m moved in, I don’t even have that excuse, but it’s still (a mess) kind of a work in progress. A full blog post with pics in the future, I promise!

Some of the biggest events to hit our household this summer involved these two…00560016-x25216688556197491552.jpg

I couldn’t resist, how cute were they?! My not-so-little, little guy turned 21 this summer and my baby girl graduated from high school! I’m so proud of them both. Big changes ahead!

There were fun, event-filled teaching trips this summer, first to Annie’s Star Quilt Guild in Chico, CA. What an amazing group. True caring and support among those quilters, many of whom or whose neighbors lost their homes in the tragic Paradise Fire last year. And a very special treat for me, they made my quilt, Stamp of Approval from Stash Lab for their Opportunity Quilt. It was beautiful and I was beaming with quilt-parent pride! Annie's Star opp quilt

Then a whirlwind trip last week down to Salem, Oregon for some time with the MidValley Quilt Guild. Double meetings, a Big String Star workshop, and lots of fun in between! There’s some serious concentration going into these string blocks but it was fun, I promise!20190829_1546245739792926417913942.jpg

I think I’m going to re-name this month “September Scramble”! I’ve made plans for Fall Quilt Market in Houston – so now I have to get my new patterns finished up! More on that soon as well and some sneak peeks for sure.bc084103-c424-409b-ab82-5e1d8ea2dbf1

But to close out, if you haven’t already spied this cute, new addition to our home on Stash Lab Quilts on Facebook or Instagram, let me introduce you to Winston!20190804_1710152295633628281465222.jpg

He’s just 3 months old now and full of fur, teeth, and puppy energy! This picture is from his first day home and he’s DOUBLED in size in the last month! Pushing 20 pounds now. He’s a mixed doodle, mom’s a Golden Doodle and dad’s an Australian Labradoodle. We’re just trying to keep up! Right now he’s learning his studio manners so he can hang out with me. Fingers crossed!

In between, I’ve actually gotten some quilts done – shocking, I know! I hope whatever your summer plans were, they included some quilting and creative time as well. We all need it!

Happy end-of-summer quilting,

Tonya

Low Volume Light Love

You probably already know how much I love low volume fabrics. They are easily my favorite fabrics to work with and I tend to sneak as many into every project that I can. And that goes beyond quilts! Whenever I find a new way to feature my favorite fabrics, I do. So let there be low volume light!

Last spring for quilt market, I featured low volume scrap strips on a lamp shade for my display table. After market, I gifted it to a friend (who happened to have lent me the lamp base!) How could I not? I loved it so much, I decided to make another one for my work desk in my studio space. After the chair project, this was a snap!

Any lampshade will do but white or some other light color would be best and the straighter the sides the better. So look for a drum style shade instead of a flared one. You can use a flared one but your fabric strips will just need to be wider to cover it and most of my scrap strips are my beloved 1 1/2″ wide strips.

You’ll need:

  • lamp shade
  • roll of wrapping paper (to trace your template)
  • fabric strips of your choosing – low volume only for me! as many as you need to go around your lampshade
  • twill tape ribbon or similar to trim your shade
  • spray adhesive (not basting spray)
  • Add-a-Quarter ruler, or other acrylic ruler with marked 1/4″
  • hot glue gun
  • your normal sewing supplies

So pretty easy, especially if you’ve done some paper foundation piecing. The first step is to make your paper template. I like to use a roll of cheap, flimsy wrapping paper. It can be any color or design because it will get torn out after sewing all of your strips together. Flimsy wrapping paper can be frustrating when you’re trying to wrap a gift but tears away beautifully for this project. Lay out the wrapping paper and roll the lamp shade a full turn, tracing the top and bottom as you go.

Cut it out along the traced lines.

After you cut out your template, test it out by wrapping it around the shade to make sure it’s covered. You can overlap by about an inch and trim more later if you want to.

Next, we need to mark sewing lines on the template. You have two choices: you can either draw your stitching lines with a ruler or you can fan fold and make creases to mark your stitching lines like this:

How close together you draw or fold your lines will determine how skinny or wide your fabric strips will need to be. With almost every lampshade, there will be a slight flare at the base. If you don’t pre-mark your lines and just sew straight cuts of fabric together, you would end up with your fabric slanting all the way around.

Time to sew! Begin somewhere in the middle of the paper template. Place two fabric strips right sides together so that they cover one section and extend over the next crease by at least 1/4 inch. Your strips should be long enough to extend 1/2″ beyond the template at both ends. Pin in place. It should look something like this. Stitch on the marked line, in my example, the crease line.

When you turn it back over, it will look like this.

Remove the pins, and flip over the top sewn strip. Give it a press with your iron – NO STEAM for now! Depending on how flimsy your paper, using steam would be asking for trouble. You should now have something like this.

Turn your piece back over and fold back the next crease or marked line on your template. I like to use my trusty Add-A-Quarter ruler when I’m doing this kind of foundation piecing. Placing the ruler 1/4″ beyond the fold, trim off any fabric excess beyond the 1/4 inch to get ready for your next strip.

Lay your next fabric strip right side up on the table and place the template piece on top, aligning the strip edges.

Again, open the template over the layer pieces and pin the three layers into place. Sew again on the next marked line.

Keep adding your strips using this flip and sew method on the paper foundation both directions until your paper template is completely covered.

When the foundation is covered completely with your fabric strips, give it a nice hot press with the iron. Look at all that low volume loveliness!

Time for the trim along the top and bottom lines of the template. Scissors or rotary cutter make quick work of this.

After you tear away all of your foundation paper, you’re ready to cover your lampshade. Position your fabric piece on the lampshade to see how it will lay. Take away and spray the surface of the lampshade all over with the spray adhesive (you might want to do this outside or be sure to cover your work surface and ventilate well.) Lay your pieced fabric piece back on and smooth over the surface of the lampshade, working out any creases as you go.

Ready for the final trim! Measure your trim ribbon to fit and cut to size. Using your glue gun, run a bead of glue around the top edge a few inches at a time and attach your ribbon trim. Repeat for the bottom of the shade.

I found binding clips to be helpful holding my trim pieces in place as I worked my way around with the glue gun.

All you have to do now is put your shade back on your lamp base and flip the switch. Ta-dah! Low volume light love! Now comes the hard part: deciding where to put it 🙂

Enjoy,

Tonya